You can grow cannabis at home in 7 clear steps: (1) check your local laws and source legal seeds, (2) pick a strain that matches your setup, (3) germinate and plant, (4) dial in your environment, (5) feed and water correctly, (6) train your plants and keep pests out, then (7) harvest, dry, and cure your buds. Follow those seven steps in order and you'll go from seed to properly cured flower without guessing your way through the process. This guide is designed to replace any PDF or book you were hoping to download, everything you need is right here.
7 Steps to Grow Cannabis PDF: Seed to Harvest Guide

Marcus Holbrook
7 May 2026
What 'Seven Steps' Actually Covers (and What It Doesn't)
When people search for a seven-step cannabis growing guide, they usually want one of two things: a practical seed-to-harvest roadmap, or a checklist of legal basics before they start. This guide gives you both, folded into the same workflow. Step 1 handles the legal side so you're not winging it. Steps 2 through 7 take you through the full growing cycle. There's no arbitrary split between 'legal stuff' and 'growing stuff' here because in practice you need to think about them together, buying seeds from an illegal source, for example, can undermine an otherwise perfect grow.
A word on scope: this guide covers indoor, outdoor, and hydroponic growing as branching paths within the same framework. You'll see where the steps diverge depending on your setup. If you only want to grow one plant on a balcony, most of this still applies, you'd just skip the sections on grow tents and lighting rigs. And if you're curious about growing specific strains like indica varieties outdoors, or how cannabis roots actually develop, those topics go deep enough to deserve their own treatment. Understanding how cannabis roots grow, including what they need in early development, helps you support stronger plants and a healthier root zone.
Step 1: Know the Law Before You Grow a Single Seed
In Canada, federal law permits adults to cultivate up to four cannabis plants per household for personal use, not four per person, four per residence. That limit applies whether you live alone or with three other adults. You must start from seeds or seedlings purchased from a provincially authorized source. In British Columbia, adults 19 and older can grow up to four non-medical plants at home. Manitoba updated its rules as of May 1, 2025, and also now allows residential cultivation of up to four plants for adults 19 and over. LGCA Manitoba confirms that adults 19 and over may grow cannabis at home, with a household maximum of four plants allows residential cultivation of up to four plants for adults 19 and over.. If you're growing for medical purposes, the rules are entirely different, you'll need a Health Canada registration certificate before you start.
Under federal rules, adults can also share up to 30 cannabis seeds and 4 non-flowering plants with other adults, which is handy if you end up with extra genetics. There's no federal cap on how much cannabis you can store at home as long as it came from a legal source. Provincial and territorial rules can be stricter, though, so always check your local government's current page before buying anything. In the US and other countries, laws vary dramatically by state or jurisdiction, always verify what's legal where you live before you spend a dollar on equipment.
One more practical note: keep seeds and harvested cannabis securely stored away from children and pets. Environmental health authorities specifically flag home cultivation as a source of exposure risk for kids, so a locked cabinet or dedicated storage box is worth the small effort.
Step 2: Pick the Right Strain and Set Realistic Expectations
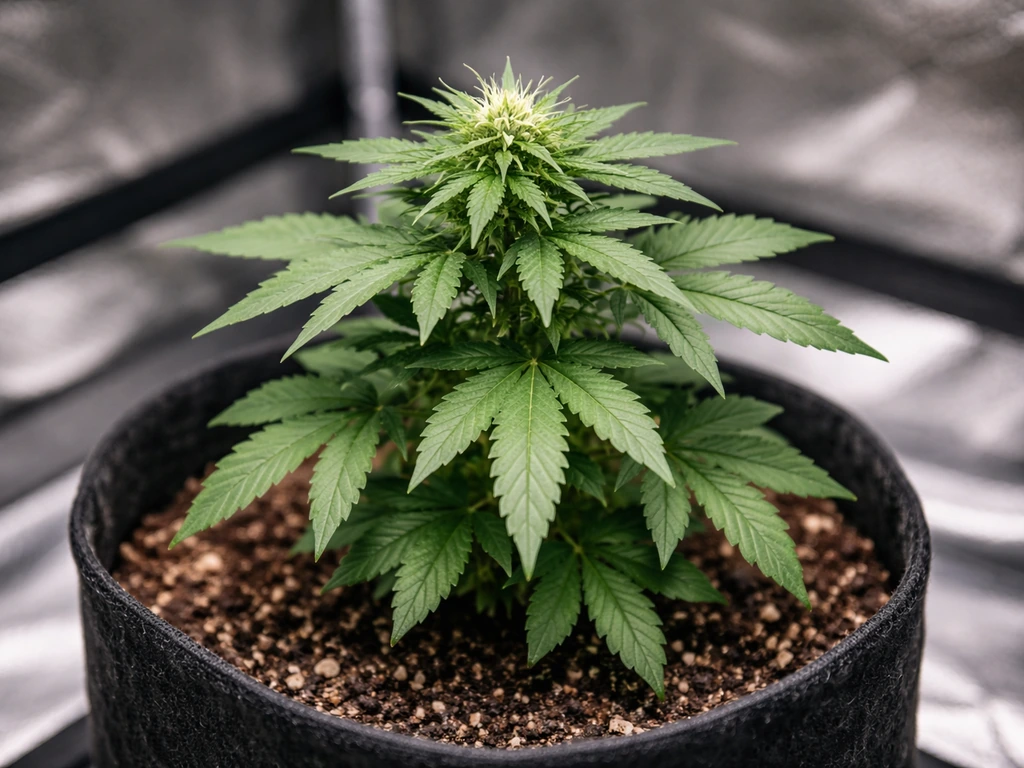
Strain choice is where most beginners either set themselves up for success or quietly guarantee future frustration. The best strain for a first grow is not the one with the highest THC on the label, it's the one that fits your space, your climate, and your experience level. Get that wrong and you'll spend three months fighting a plant that wants to grow eight feet tall in a five-foot tent, or one that demands a level of humidity control you can't realistically maintain. To grow giant cannabis plants, you’ll want to match strain and training choices to your available space and environment, then push consistent growth without stressing the plant.
For indoor beginners, autoflowering strains are genuinely forgiving. They flower based on age rather than light schedule, finish in roughly 70 to 90 days from seed, stay compact (usually under 90 cm), and tolerate minor mistakes better than photoperiod strains. Good beginner-friendly autoflowers include Northern Lights Auto, Blueberry Auto, and White Widow Auto. If you want more control over yield and timing, photoperiod feminized seeds are the next step up, you trigger flowering manually by switching your light schedule to 12 hours on, 12 hours off.
For outdoor growing, your local climate matters more than anything else. Indica-dominant strains (shorter, denser, faster-finishing) handle cooler, shorter summers better than sativa-dominant varieties. If you're in a northern climate with a shorter growing season, look for strains with a flowering time under 8 weeks and harvest dates before mid-October. Sativas can take 12 to 16 weeks to flower and need warm weather well into fall, not ideal for most of Canada.
For hydroponics, stick to strains known for stable growth patterns. Fast-growing sativa-heavy hybrids can get out of hand quickly in a hydro system if you're not managing nutrient delivery precisely. A balanced hybrid or a compact indica is easier to manage while you're still learning the system. If you’re specifically growing canna indica, focus on a compact, manageable indica strain and dial in conditions that match its shorter, bushier growth pattern.
| Setup | Recommended Strain Type | Typical Timeline | Key Advantage |
|---|---|---|---|
| Indoor (beginner) | Autoflowering feminized | 70–90 days seed to harvest | No light schedule changes needed |
| Indoor (intermediate) | Photoperiod feminized | 90–130 days seed to harvest | More yield control and training options |
| Outdoor (cool climate) | Indica-dominant photoperiod | Ready by late September/early October | Handles shorter seasons well |
| Outdoor (warm climate) | Hybrid or sativa-dominant | Ready by mid-October or later | Larger potential yields |
| Hydroponic | Compact indica or balanced hybrid | 65–100 days seed to harvest | Faster growth with proper nutrient delivery |
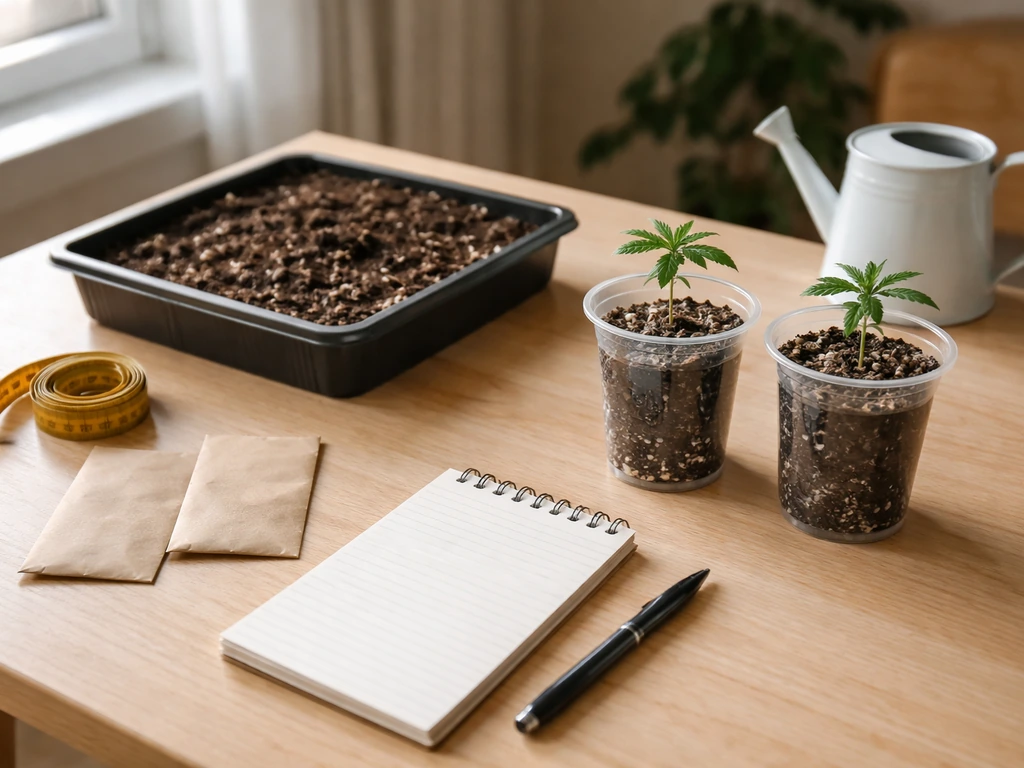
Step 3: Germinate, Plant, and Get Through the Seedling Stage
Germination is straightforward. The paper towel method works well for beginners: place seeds between two damp paper towels, seal them in a zip-lock bag or between two plates, and keep them at around 22 to 25°C (72 to 77°F). Most seeds pop a tap root within 24 to 72 hours. Once the tap root is 0.5 to 1 cm long, plant it root-down about 1 cm deep in your starter medium. Don't let seeds sit in water for more than 24 to 32 hours or they'll drown.
Indoor Setup
Start seedlings in small containers (solo cups or 0.5-litre pots) filled with a light, airy seedling mix. Avoid heavy potting soils with added nutrients at this stage, seedlings are sensitive and can burn. Transplant to your main container (typically 11 to 15 litres for photoperiod plants) once roots start coming out the drainage holes. For autoflowers, many growers start directly in the final container to avoid transplant stress.
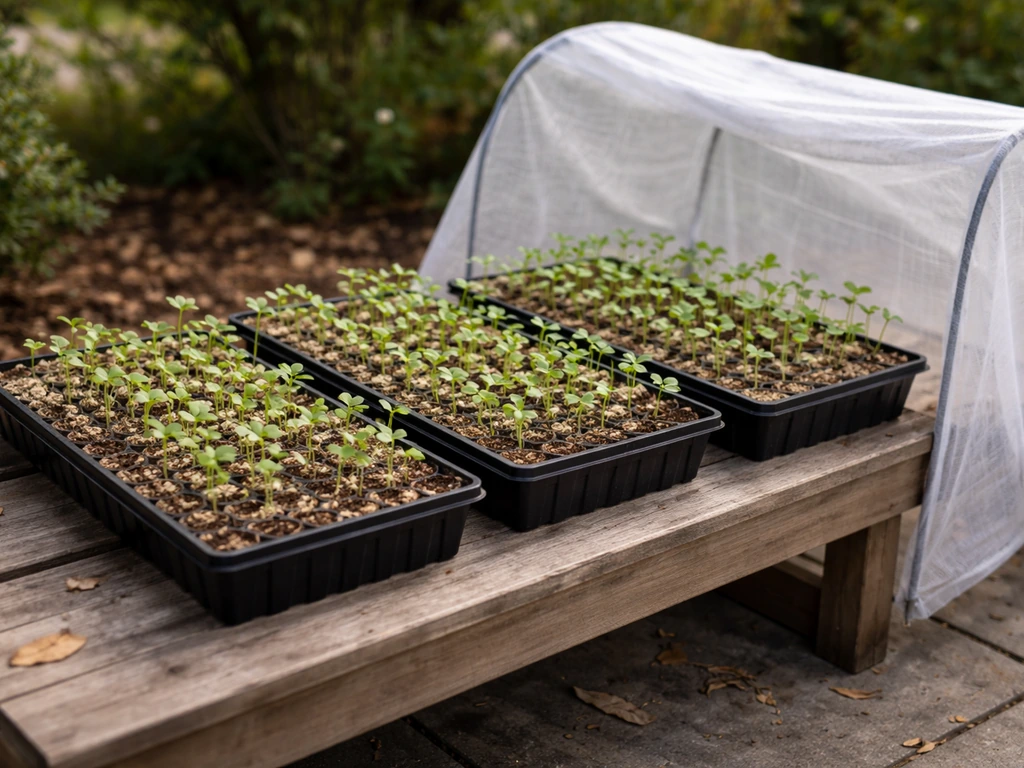
Outdoor Setup
Start seeds indoors 2 to 4 weeks before your last frost date, then harden off seedlings over 7 to 10 days before moving them outside permanently. Acclimate them gradually, a few hours of direct sun per day to start, building up over a week. Choose a spot that gets at least 6 to 8 hours of direct sunlight daily. Large fabric pots (30 to 50 litres) or a raised bed with well-draining soil work well if you're not planting directly in the ground.
Hydroponic Setup
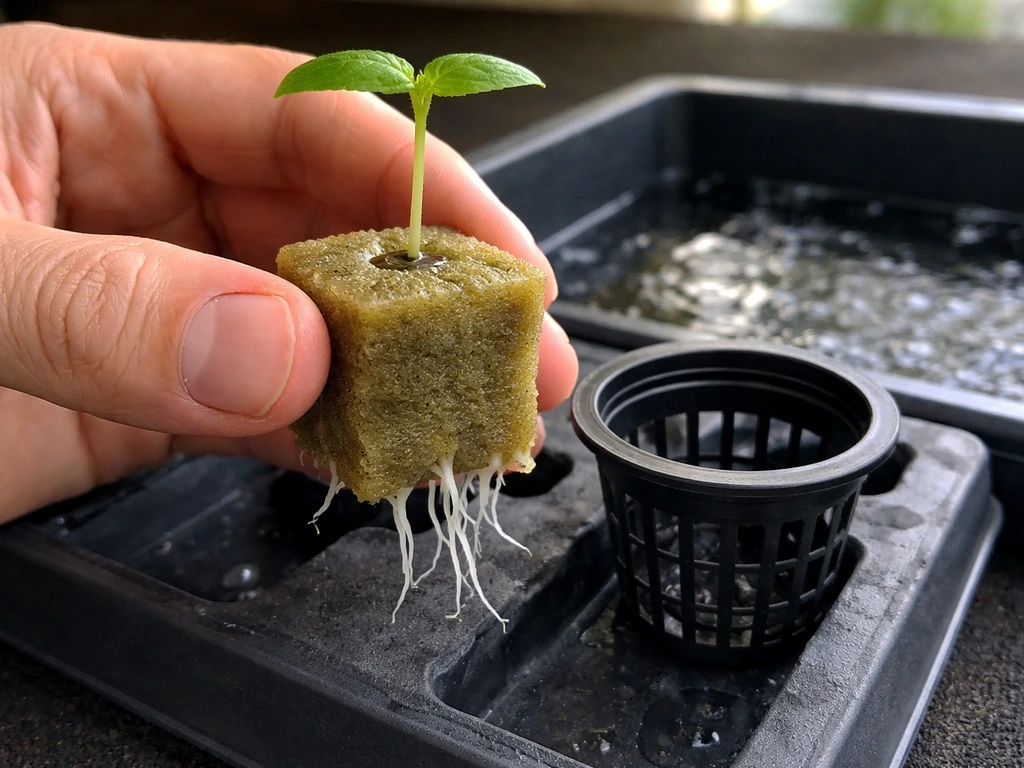
Germinate in rockwool cubes or rapid rooters kept moist (not soaking) at 24 to 26°C. Once the seedling's roots are visible at the bottom of the cube, transfer to your hydroponic system, deep water culture (DWC) is the most beginner-friendly option. Keep reservoir temperature between 18 and 22°C to prevent root rot and maintain dissolved oxygen levels with an air pump and air stone from day one.
Step 4: Dial In Your Environment
This is the step most beginners underestimate. Plants can survive a bad nutrient schedule; they struggle to recover from chronic heat stress or a mold outbreak caused by stagnant air. Get the environment right first and everything else becomes easier. Here are the parameters that matter most:
| Parameter | Seedling / Early Veg | Late Veg | Flowering | Late Flowering / Ripening |
|---|---|---|---|---|
| Temperature (day) | 22–26°C (72–79°F) | 22–28°C (72–82°F) | 20–26°C (68–79°F) | 18–24°C (64–75°F) |
| Humidity (RH) | 65–70% | 50–70% | 40–50% | 35–45% |
| Light (indoor) | 18/6 or 20/4 hrs | 18/6 hrs | 12/12 hrs (photoperiod) | 12/12 hrs |
| Airflow | Gentle — oscillating fan on low | Moderate — direct stem movement | Good — avoid dead zones | Strong — critical for mold prevention |
Lighting for Indoor Grows
Full-spectrum LED grow lights are the current standard for home growers, they run cooler than HPS (high-pressure sodium) lights, use less electricity, and cover both veg and flower spectrums with a single fixture. For a 1.2 x 1.2m (4 x 4 ft) tent, a quality LED in the 400 to 600 true watt range (actual draw, not the inflated 'equivalent' wattage) is plenty. Keep lights 45 to 60 cm above seedlings and lower to 30 to 45 cm during veg, adjusting based on your specific fixture's recommendations.
Airflow and VPD
Vapor Pressure Deficit (VPD) sounds technical but in practice it just means keeping temperature and humidity in a range where your plants can transpire efficiently. An oscillating fan inside the tent plus an inline exhaust fan pulling fresh air through are the minimum setup. Aim for a full air exchange every 1 to 3 minutes during flowering. Stagnant air during flowering is one of the fastest routes to botrytis (bud rot), especially in dense cola structures.
Step 5: Feed Your Plants and Manage the Root Zone
Overfeeding kills more beginner grows than underfeeding. Cannabis in good soil doesn't need added nutrients for the first 2 to 3 weeks, most quality soils come pre-loaded with enough nutrients to carry seedlings through early veg. Start feeding at around 25% of the recommended dose on your nutrient label, then increase gradually while watching how your plants respond. Yellow tips or leaf edges usually mean nutrient burn; uniform yellowing of older leaves usually means deficiency.
Basic Nutrient Schedule (Soil)
- Weeks 1–3 (seedling): Water only, no nutrients. pH your water to 6.0–7.0 for soil.
- Weeks 3–6 (veg): Introduce a balanced grow formula (higher nitrogen). Start at 25% dose, work up to full dose over 2 weeks.
- Week 6 to flip (late veg): Maintain nitrogen-heavy feed, add light phosphorus/potassium support.
- Weeks 1–3 of flower: Transition feed — reduce nitrogen, raise phosphorus and potassium (P/K).
- Weeks 3–7 of flower: Full bloom formula, high P/K, minimal nitrogen. Add a CalMag supplement if using RO or soft water.
- Weeks 7–8 of flower (flush): Plain pH'd water only for 1 to 2 weeks before harvest to clear residual salts.
Watering and pH
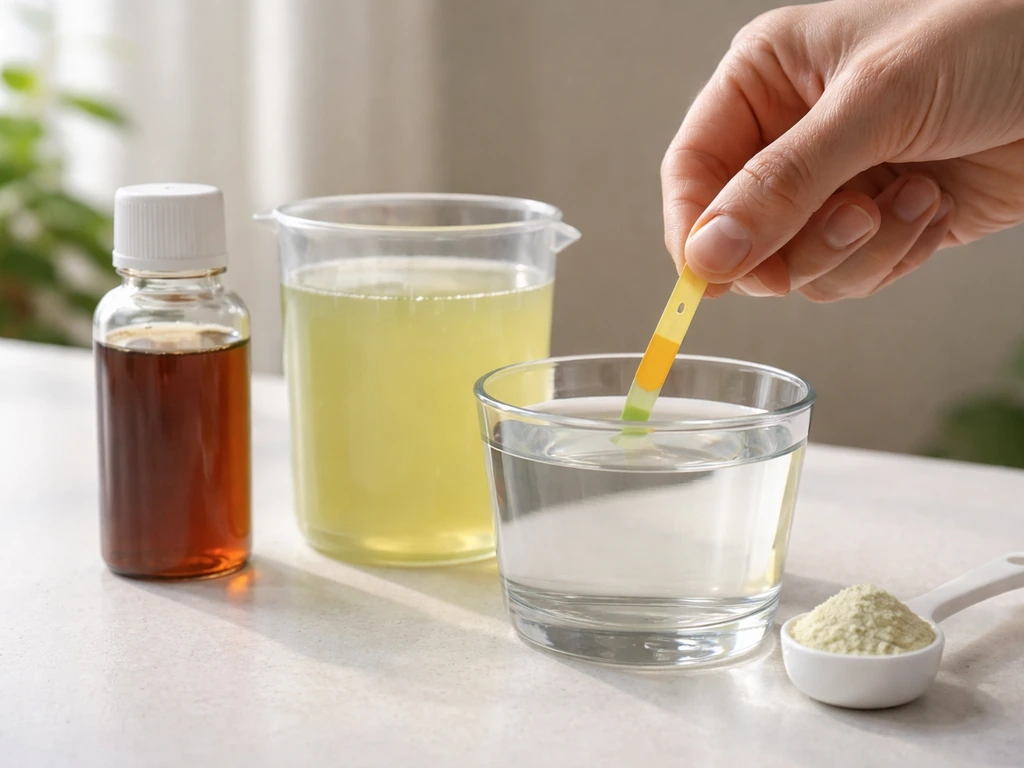
pH is the single most overlooked variable in beginner grows, and getting it wrong locks out nutrients no matter how much you feed. For soil, target a pH of 6.0 to 7.0 (6.2 to 6.8 is the sweet spot). For hydroponics, target 5.5 to 6.5. Use a quality digital pH meter, cheap strip tests aren't accurate enough for this. Water when the top 2 to 3 cm of soil feels dry, or when the pot feels noticeably lighter when you lift it. In hydro, check and adjust reservoir pH and nutrient levels daily.
Root health matters as much as what's happening above soil. Cannabis roots need oxygen, that means well-draining soil with good aeration, fabric pots that air-prune roots naturally, and never leaving plants sitting in standing water. In hydro, root rot is your biggest threat and it moves fast: brown, slimy roots and a foul smell are the warning signs. Increase dissolved oxygen, drop reservoir temperature below 21°C, and consider a beneficial bacteria product like Hydroguard if root rot takes hold.
Step 6: Train Your Plants, Prevent Problems, and Troubleshoot What Goes Wrong
Plant Training
Training increases yield by exposing more bud sites to direct light instead of letting the canopy shade the lower plant. Low-stress training (LST) is the beginner's best tool: gently bend the main stem sideways and tie it down with soft ties or plant clips, encouraging side branches to grow upward and compete with the main cola. Start LST during late veg when stems are still flexible. For photoperiod plants, topping (cutting the main stem just above a node) at week 3 to 4 of veg creates two main colas and a much bushier plant overall.
Avoid heavy training on autoflowers, they don't have time to recover from high-stress techniques like topping or FIMing. Stick to LST only for autos. For growers interested in pushing plant size, techniques like SCROG (Screen of Green) and supercropping are worth exploring once you have a couple of grows under your belt.
Pest Prevention
Prevention is dramatically easier than treatment. Keep your grow space clean, inspect plants at least twice a week (especially the undersides of leaves), and introduce beneficial insects like predatory mites or ladybugs if you're growing outdoors. For indoor grows, a proper intake/exhaust setup with filtered air dramatically reduces pest entry. Spider mites, fungus gnats, and aphids are the most common indoor pests. Fungus gnats breed in wet topsoil, letting soil dry out more between waterings usually stops them. Yellow sticky traps catch adults and help you monitor population levels.
Disease Prevention
Powdery mildew and botrytis (bud rot) are the two diseases that most commonly devastate home grows. Powdery mildew shows as white powdery patches on leaves and thrives when humidity exceeds 60% in veg or 50% in flower. Reduce humidity, increase airflow, and apply a diluted hydrogen peroxide spray (3% solution, 1:9 ratio with water) as an early treatment. Botrytis starts inside dense buds and you often don't see it until you're cutting at harvest, brown, mushy interior tissue is the telltale sign. Prevention is everything: keep humidity below 45% in late flower, ensure airflow reaches inside the canopy, and remove any dying leaves promptly.
Common Problems and Quick Fixes
| Symptom | Likely Cause | Fix |
|---|---|---|
| Yellow leaf tips or edges | Nutrient burn (overfeeding) | Flush with plain pH'd water, reduce feed dose by 25–50% |
| Uniform yellowing of older leaves | Nitrogen deficiency | Increase nitrogen feed, check pH is in range |
| Purple/red stems | Phosphorus deficiency or temperature stress | Check temperature, add phosphorus, confirm pH |
| Curling leaves (upward) | Heat stress or overwatering | Lower temps, reduce watering frequency |
| Spots or speckles on leaves | Spider mites or calcium deficiency | Check leaf undersides with a loupe; treat mites or add CalMag |
| White powder on leaves | Powdery mildew | Improve airflow, lower humidity, apply diluted H2O2 or neem |
| Brown mushy buds | Botrytis (bud rot) | Remove affected material immediately, reduce humidity, increase airflow |
| Slow growth / pale plants | pH out of range locking out nutrients | Check and correct pH at root zone |
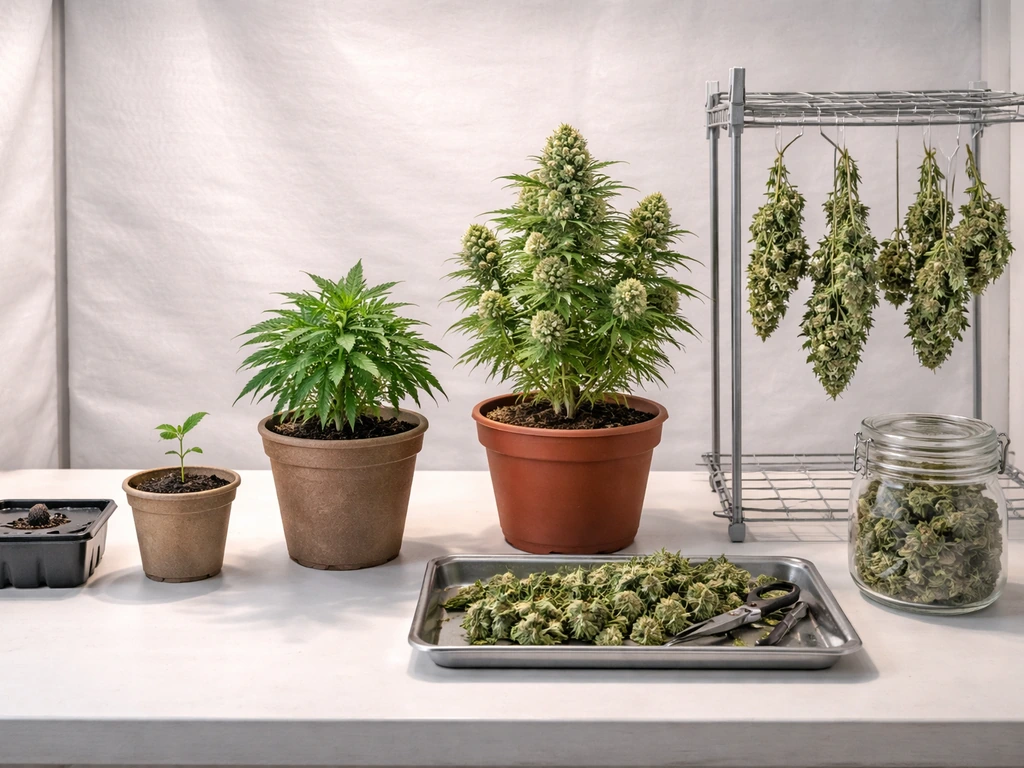
Step 7: Harvest, Dry, Cure, and Store Your Buds Properly
Knowing When to Harvest
Harvest timing is the most important quality decision you make in the entire grow. Harvesting too early gives you lightweight, harsh buds with an anxious, unpleasant effect. Harvesting too late gives you degraded THC, couch-lock effects (from CBD/CBN conversion), and a sleepier, less potent product. The only reliable way to judge harvest timing is with a jeweler's loupe or digital microscope, you're looking at the trichomes on the buds themselves.
- Clear trichomes: too early, wait.
- Mostly cloudy/milky trichomes with no amber: peak THC, harvest now for a more cerebral, energetic effect.
- Mostly cloudy with 10–20% amber: slightly past peak THC, more relaxing/body-focused effect.
- More than 30% amber: degraded THC, heavy sedative effect — many growers consider this overripe.
Also watch the pistils (the orange/red hairs on buds), when 70 to 90% have darkened and curled in, it's a signal that you're in the harvest window. Use pistils as a rough guide and trichomes as the final confirmation.
Harvesting and Wet Trimming vs. Dry Trimming
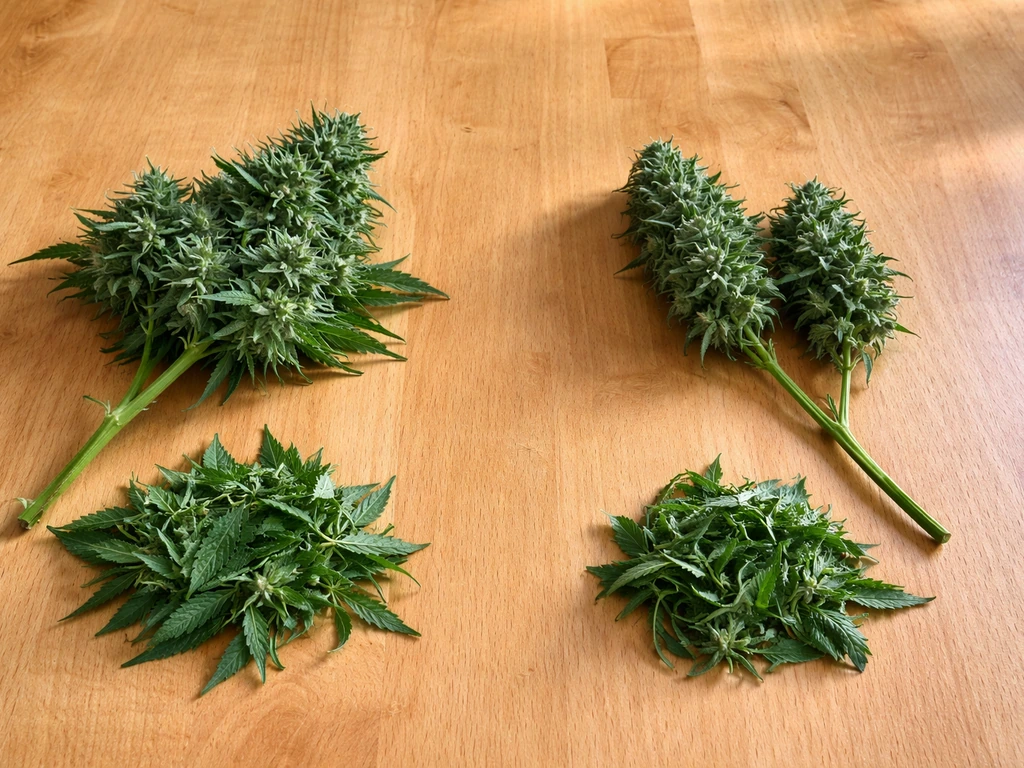
Cut plants at the base or take branches at a time. Wet trimming (removing sugar leaves immediately after cutting) is faster and easier to work with while leaves are still stiff, but it can speed up moisture loss during drying. Dry trimming (leaving leaves on until after drying) is slower and stickier work, but many growers find it produces a smoother, slower, more even dry, especially important in low-humidity environments where buds might dry too fast.
Drying
Hang branches upside down in a dark room with good airflow but no direct fan blast on the buds. Target 15 to 21°C (60 to 70°F) and 50 to 60% relative humidity. Drying too fast (under 55% humidity or over 24°C) locks chlorophyll into the buds and gives you a harsh, grassy smoke. Drying too slow risks mold. The goal is 7 to 14 days of slow, even drying. Buds are ready to jar when the small stems snap cleanly instead of bending.
Curing
Curing is what separates okay weed from genuinely smooth, flavorful, well-developed cannabis. Place dried buds loosely in wide-mouth glass mason jars, fill jars about 75% full to leave air space. For the first week, open jars twice a day for 5 to 10 minutes (this is called 'burping') to release moisture and CO2. After the first week, burp once a day. After two weeks, drop to every few days. A two to four week cure improves smoothness noticeably; six to eight weeks produces significantly better flavor and potency. Use a small hygrometer inside each jar to monitor RH, you want 58 to 65% inside the sealed jar. Anything above 70% risks mold; anything below 55% means the cure is stalling.
Storage and Safe Keeping
Once cured, store jars in a cool, dark place, a cabinet or drawer away from light and heat. UV light degrades THC faster than almost anything else, so avoid clear glass on a sunny windowsill. Properly cured and stored cannabis maintains quality for 6 to 12 months. Use child-resistant containers and keep everything locked away if there are children or pets in the home, this is both a safety responsibility and, in many jurisdictions, a legal one.
Your Immediate Next Steps
If you're starting from zero right now, here's what to do this week. First, confirm what your provincial or territorial rules say about home cultivation, don't assume the federal four-plant limit is the only rule that applies to you. Second, decide on your growing method (indoor tent, outdoor garden bed, or hydroponic system) so you can choose a strain that actually fits. Third, source your seeds from a legal, licensed retailer. From there, steps 3 through 7 follow in sequence, and you can come back to this guide at each stage. Most beginner mistakes happen in steps 4 and 5, environment and feeding, so give those sections extra attention as you progress.
Growing cannabis well is a skill that builds with every cycle. Your first grow will teach you more than any guide can, keep notes on what you did, photograph problems when they appear, and don't be too hard on yourself when something goes sideways. Even experienced growers lose plants to pests or environmental swings. The difference is they know what to look for, and now you do too.
FAQ
How do I pick the “right” strain if THC on the package is the only thing I can judge right now?
Don’t use the label as a target for the whole grow. The same strain can look very different depending on light intensity, airflow, and whether you’re running soil or hydro. A practical approach is to set your environment goals first (temperature, humidity, VPD, and air exchange), then choose a strain that matches your ability to hold those targets consistently.
My seedlings stopped growing after germination, what should I check first?
If your seedling seems to stall after sprouting, the most common causes are too-cold media, overly wet starter mix, and pH issues. Let the top layer dry slightly between waterings, confirm temperature is in the low-to-mid 20s °C, and if you’re in hydro check pH daily. Avoid adding nutrients until you see healthy new growth, overfeeding at this stage can burn roots.
What changes if I’m growing outdoors in a climate with unexpected early cold or rain?
For outdoor grows, a short summer can be more limiting than your plant’s “genetics.” Favor strains with a flowering time that completes before typical frost, and consider using temporary shade or a simple cover during unexpected cold snaps and heavy rain. Also plan for wind, because constant dampness inside dense canopies increases botrytis risk.
I forgot to harden off, can I still salvage the move outside?
If you missed the chance to harden off before moving outdoors, increase acclimation more slowly instead of changing everything at once. Start with partial shade and only a few hours of sun per day, then step up gradually over a week or longer. Sudden full sun or strong wind can cause leaf curl and prolonged stress, and it can delay flowering timing.
How do I know if my problem is pH versus nutrients, and what measurements should I take?
Common signs of pH trouble include nutrient deficiency-looking leaves even though you’re feeding, browned or slow-growing tips, and leaves that look “lockout-like” rather than classic deficiency patterns. Measure pH of water and runoff (soil) or reservoir (hydro), then adjust in small steps. If using soil, remember that your input pH and your runoff pH can be different, so check both if problems persist.
What’s the best way to avoid overwatering (and fungus gnats) in a soil setup?
For soil, a practical way to prevent overwatering is to water thoroughly, then wait until the top 2 to 3 cm is dry and the pot feels lighter before watering again. For hydro, ensure strong aeration and avoid temperature spikes above the low 20s °C. If you see fungus gnats, drying the top layer between waterings usually helps break the breeding cycle.
Can I treat powdery mildew or botrytis with sprays instead of preventing it?
Yes, but only if you can keep humidity and airflow stable during the whole flowering window. If you use a spray like hydrogen peroxide early, do it when you can reach the entire canopy evenly, and do not increase humidity to compensate after spraying. The bigger win is prevention targets, keep humidity lower than mid-flower thresholds and ensure air reaches inside buds.
My buds are drying too quickly, how do I correct it during the drying phase?
If your drying is too fast, buds may feel dry on the outside but still be “wet” inside, resulting in harsher smoke and weak curing. Slow it down by lowering airflow directly over the drying area, slightly reducing room temperature, and adjusting to the recommended humidity range. Also avoid running strong fans that blast buds, that speeds overdrying and case-hardening.
Once cured, what storage mistakes most reduce potency and flavor?
Storing cured cannabis in mason jars is good, but it still degrades over time. Avoid frequent opening, because every burp releases moisture and lets in oxygen. If you want to extend quality beyond the typical 6 to 12 months window, keep jars very cool and dark, and consider using a hygrometer to ensure the jar RH stays in the mid-to-high 50s to low 60s.
What should I record so I can fix problems faster in my second grow?
Keep a grow log and photo the same leaf positions each week, including your lights on/off schedule, water dates, and any pH or runoff readings. When something goes wrong, you can correlate symptoms with timing, for example nutrient burn shortly after a feed or curling after a humidity spike. Also track strain, because fixes that work for one grow may not fit the next if genetics differ.
Next Article
How Much Weed Can One Seed Grow and How to Maximize It
Realistic yield from one cannabis seed, what limits it, and steps to maximize flower at home from seed to harvest.