Growing organic weed at home means building healthy soil full of living biology, feeding your plants with natural amendments instead of synthetic salts, and letting the plant work with its environment rather than against it. Done right, you get cleaner-tasting, smoother-smoking buds, a more forgiving root zone, and the satisfaction of knowing exactly what went into your grow. This guide walks you through every step from seed to jar, including the legal check you need to do first.
How to Grow Organic Weed From Seed to Harvest

Marcus Holbrook
22 May 2026
Check the Law Before You Grow a Single Seed
This part is non-negotiable. Cannabis cultivation is still illegal under U. S. federal law under the Controlled Substances Act, regardless of what your state allows.
That gap between federal and state law is real, and it matters. What you can do legally depends entirely on your state or country, and the rules vary a lot. Connecticut allows up to 3 mature and 3 immature plants per qualifying adult, with a household cap of 12 total. New York has its own home cultivation rules under Section 222.
15 that differ again. Virginia requires outdoor plants to be completely hidden from public view beyond your property line. Maine goes further and mandates privacy fencing at least 6 feet high for enclosed outdoor grows to discourage theft and unauthorized access.
Before you buy seeds or soil, spend 20 minutes researching your specific jurisdiction. Look up your state cannabis control authority's website and search for 'home cultivation.' Verify: how many plants are allowed, whether plants must be enclosed or out of public sight, whether you need a medical card, and whether there are possession limits on harvested flower. If you are outside the U.S., check national and local laws independently. Grow within those limits, keep your grow private and secure, and never give plant material to minors. Everything else in this guide assumes you have confirmed your grow is legal where you live.
What 'Organic' Actually Means for Home Cannabis
Technically, USDA Organic certification (governed by 7 CFR Part 205 and the National Organic Program) applies to agricultural products and requires accredited third-party certification. Cannabis can't carry a USDA Organic seal because it's federally controlled. What 'organic' means for a home grower is a practical philosophy: no synthetic fertilizers, no synthetic pesticides, and a focus on feeding the soil biology rather than the plant directly. A useful shortcut is to look for inputs that are OMRI Listed (Organic Materials Review Institute), which means they have been independently reviewed against NOP standards. If a product is OMRI Listed, it fits an organic-minded grow.
Choosing Your Organic Growing Method
There are three realistic organic approaches for home growers. Each has real trade-offs depending on your space, budget, and how hands-on you want to be.
Standard Organic Soil in Containers
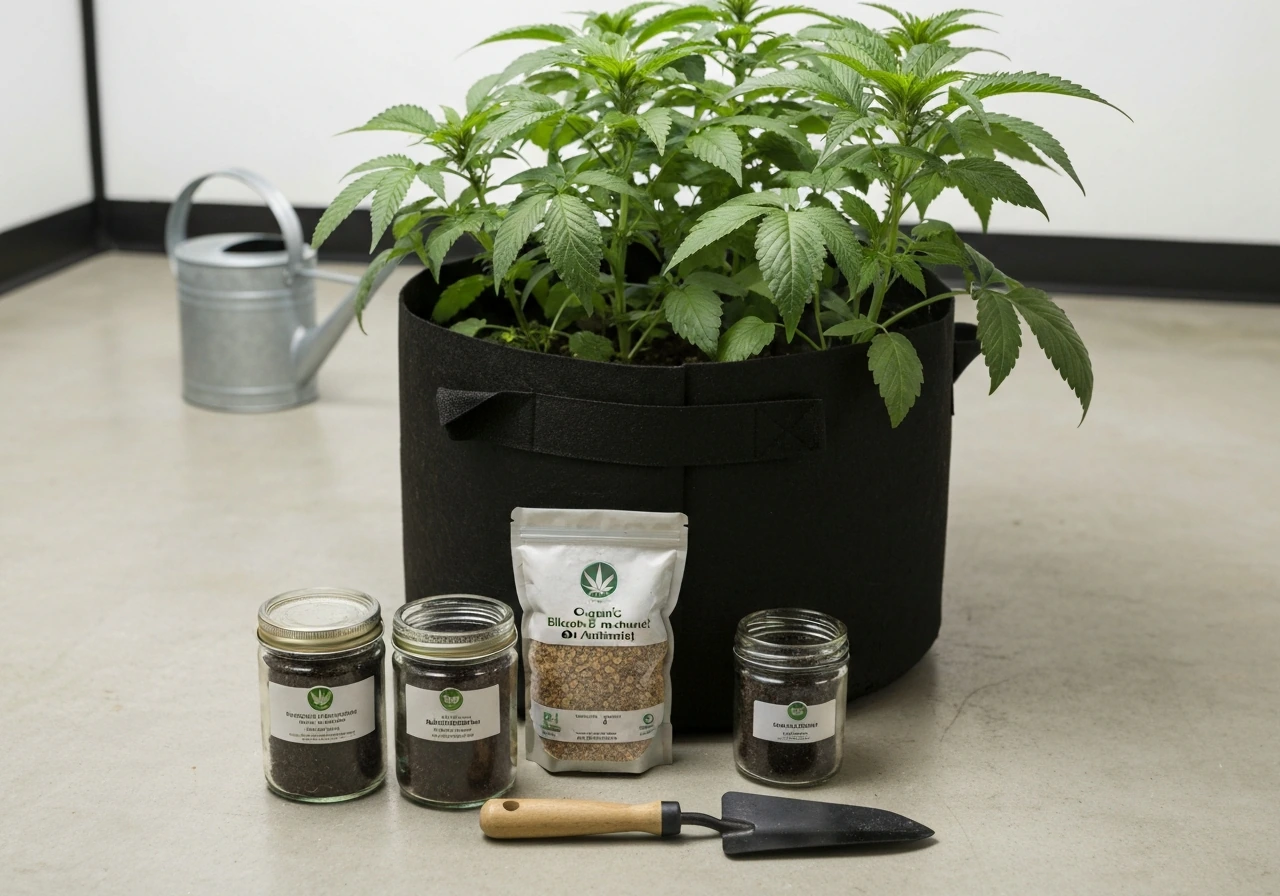
This is the easiest entry point. You buy a quality organic potting mix (look for brands that are peat or coco-based and amended with things like bat guano, kelp meal, and worm castings), transplant into fabric pots or containers, and supplement with organic liquid feeds and top-dresses as the plant grows. The soil is not a fully self-sustaining ecosystem, so you are managing nutrient delivery more actively. It is beginner-friendly and very forgiving.
Living Soil
Living soil is the gold standard for organic cannabis. You build (or buy) a soil mix rich in compost, aged worm castings, glacial rock dust, kelp meal, crustacean meal, and other slow-release minerals. You inoculate it with mycorrhizal fungi and beneficial bacteria. Then you let the microbial ecosystem do the feeding for you. The soil biology breaks down organic matter and delivers nutrients to the roots. Once established, you mostly water with plain water and light compost teas. The trade-off is that it takes more upfront planning and a larger container (25 gallons or more works well) to give the biology enough room. This is the approach where cannabis flavor and terpene expression really shine.
Organic Hydroponics (Soilless)
Yes, you can grow organically without soil, but it gets complicated. Organic hydro means using OMRI-listed liquid nutrients (fish hydrolysate, seaweed extracts, amino acid-based products) in a water-based or coco coir medium. The challenge is that organic inputs can clog systems and create biofilm in reservoirs. Most growers who go this route use coco coir as a substrate with hand-watering rather than recirculating systems. It is faster than living soil but requires more attention to pH (target 5.8 to 6.2 for coco) and cleanliness. If you are drawn to faster growth cycles, the guide on how to grow weed faster covers some of these efficiency methods in more depth.
| Method | Best For | Setup Cost | Feeding Effort | Flavor Potential |
|---|---|---|---|---|
| Standard Organic Soil | Beginners, small indoor grows | Low | Moderate (top-dress + liquids) | Good |
| Living Soil | Growers who want the best flavor, outdoor or large containers | Medium-High | Low once established | Excellent |
| Organic Hydro (Coco) | Faster cycles, indoor efficiency focus | Medium | High (hand-water frequently) | Good |
For most beginners, start with standard organic soil in fabric pots and work toward living soil on your second or third run once you understand how your plants respond. That is exactly the path I took, and it made the learning curve much less painful.
Picking the Right Strain and Sourcing Seeds or Clones
Strain choice shapes your entire grow. For beginners, prioritize strains described as 'vigorous,' 'easy to grow,' or 'mold-resistant.' Indica-dominant or hybrid strains tend to stay shorter (easier to manage indoors) and finish flowering faster, often 8 to 9 weeks. Sativa-dominant strains can stretch tall and take 10 to 14 weeks to flower, which can be tricky in a small tent. Autoflowering strains are worth considering: they flower based on age rather than light cycle, finish in as little as 70 to 90 days from seed, and stay compact. The trade-off is that autos don't respond well to stress, so they are less forgiving of transplanting or training mistakes.
For outdoor grows, match your strain's flowering time to your local season. If your first frost comes in October, choose a strain that finishes by late September. Many breeders list outdoor harvest windows in their strain descriptions.
Source seeds from reputable seed banks that provide feminized seeds (which eliminate male plants) with clear genetics and germination guarantees. If clones are available from a licensed dispensary or trusted source in your state, they save 2 to 3 weeks compared to starting from seed and give you a known phenotype. Avoid random bag seed if you want predictable results.
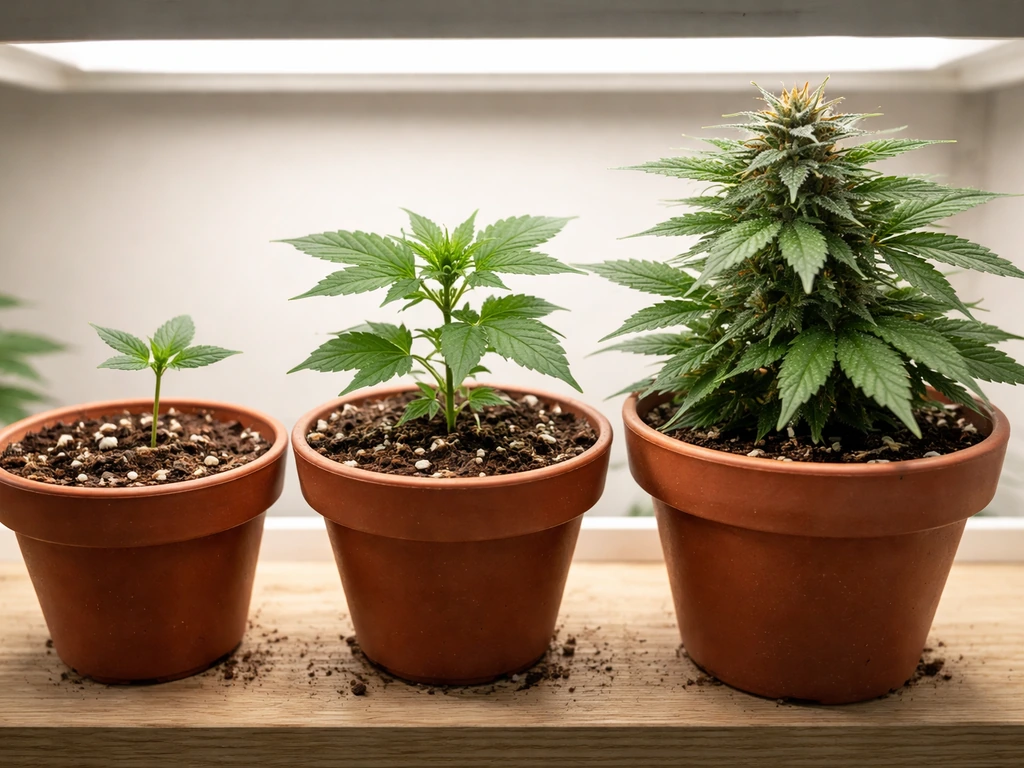
Germination, Transplanting, and Early Veg Setup
Germinating Your Seeds
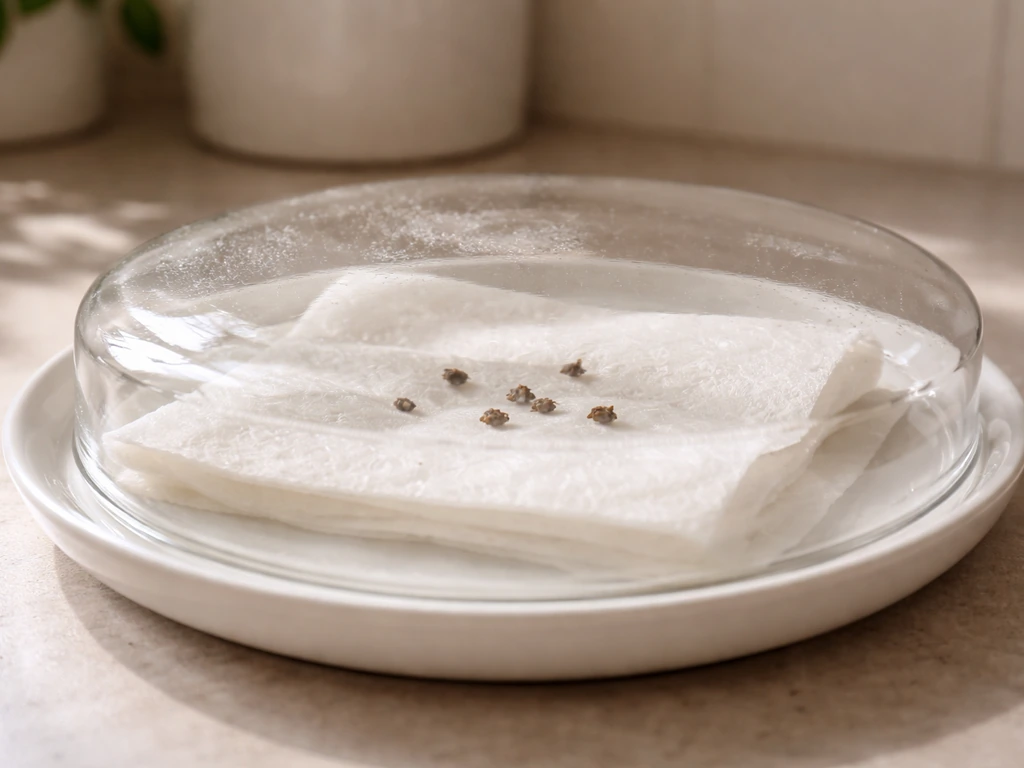
The paper towel method works well. Place seeds between two damp paper towels on a plate, cover with another plate to trap humidity, and keep them in a warm spot at 70 to 80°F (21 to 27°C). Check every 12 hours. Most seeds crack and show a taproot within 24 to 72 hours. Once the taproot is 0.5 to 1 cm long, plant it taproot-down in a small container (a solo cup or 4-inch pot) filled with a sterile, lightly amended seedling mix. Do not use heavily fertilized soil for seedlings as it will burn them.
Damping-off is the number one seedling killer: it is a soilborne fungal problem that causes stems to rot at the soil line. Prevent it by using sterile seed-starting mix (never reused soil), keeping moisture levels consistent but never waterlogged, and ensuring good airflow. Water only when the top inch of the mix feels dry. I learned this the hard way after losing a whole tray of seedlings to overwatering in week one.
Light Schedules for Seedlings and Veg
Seedlings need 16 to 18 hours of light per day. For indoor grows, keep your light about 18 to 24 inches above seedlings depending on the fixture type, and work up to the full veg photoperiod of 18 hours on / 6 hours off once the plant shows its second set of true leaves. Maintain this 18/6 schedule throughout the entire vegetative phase. For photoperiod strains, flowering does not begin until you blank" rel="noopener noreferrer">switch to 12 hours light / 12 hours dark. Autoflowering strains can stay on 18/6 or even 20/4 throughout their life.
Transplanting
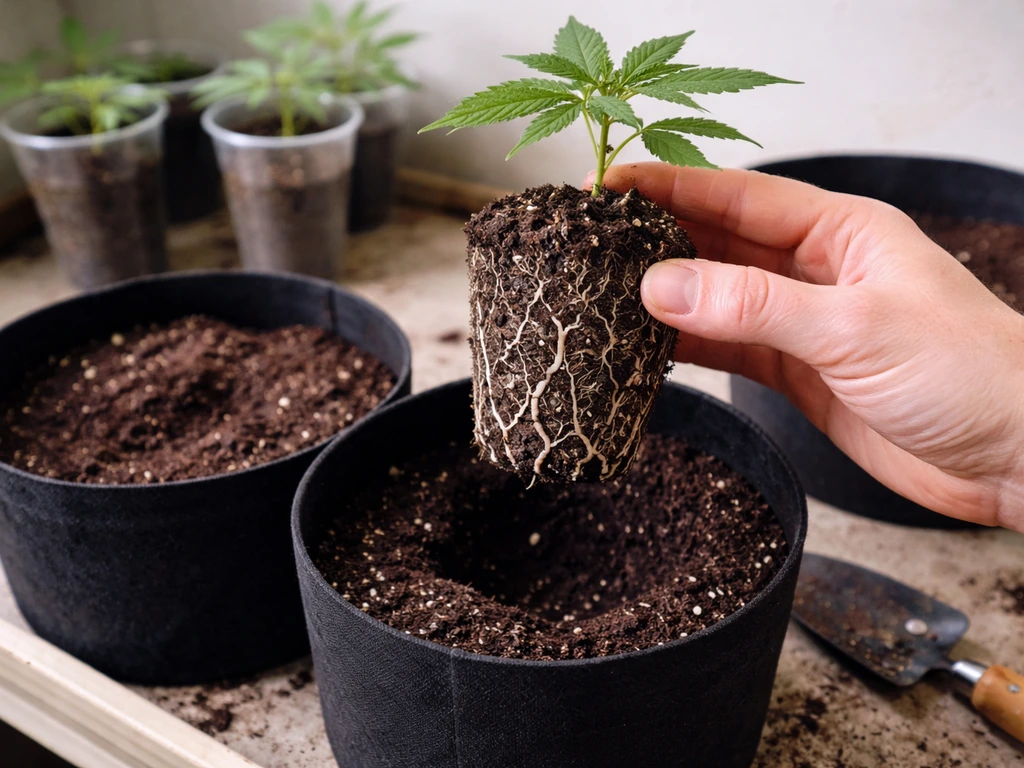
Transplant when roots begin circling the bottom of the container or you see roots poking out of drainage holes. Go up one pot size at a time: solo cup to 1-gallon to 3-gallon (or your final container). For living soil, many growers plant directly into their final large container to avoid disturbing the microbial ecosystem. Water in with plain pH-adjusted water (6.0 to 7.0 for soil) after transplanting, and give the plant 24 to 48 hours to settle before feeding.
Your Organic Nutrition Plan
Organic nutrition is about building the soil and letting biology do the work, not dumping liquid nutrients on a schedule. The approach changes slightly depending on which method you chose.
Building Your Organic Soil Mix
A solid base living-soil or amended organic mix typically uses: 1 part quality compost (well-aged, from verified clean feedstocks), 1 part aerated medium (perlite, pumice, or biochar), and 1 part base substrate (quality coco, peat, or aged forest products). Per cubic foot of base mix, blend in approximately: 1 to 2 cups worm castings, 0.5 cup kelp meal, 0.5 cup neem or karanja meal, 0.5 cup crustacean/crab meal (chitin source), 0.25 cup glacial rock dust or basalt, and a small amount of mycorrhizal inoculant per plant hole. Let this mix cook (sit moist and covered) for at least 2 to 4 weeks before planting so the amendments break down and the microbiology activates.
Vegetative Feeding Schedule
In veg, plants need more nitrogen. If your base soil is well-amended, a living-soil container may need very little extra input. For standard organic potting mixes, top-dress every 2 to 3 weeks with a nitrogen-forward amendment blend: worm castings (a half-cup per plant) plus kelp meal (a tablespoon per plant) worked lightly into the top inch of soil, then watered in. You can also use OMRI-listed liquid inputs like fish hydrolysate (2 to 3 ml per liter) and liquid kelp (1 to 2 ml per liter) applied once a week.
Flowering Feeding Schedule
Once you flip to 12/12 (or once autos start showing pistils), shift toward phosphorus and potassium-forward inputs. Top-dress weeks 1 to 3 of flower with a bloom amendment blend: 0.5 cup worm castings, 1 tablespoon bone meal or fish bone meal, 1 tablespoon kelp meal. From weeks 4 to 6, shift to crustacean meal for potassium and chitin, and add a tablespoon of langbeinite (a natural K-Mg-S mineral) per plant. Stop top-dressing 2 to 3 weeks before harvest and flush lightly with plain water to let the plant use its remaining stored nutrients.
How to Make and Use Compost Tea
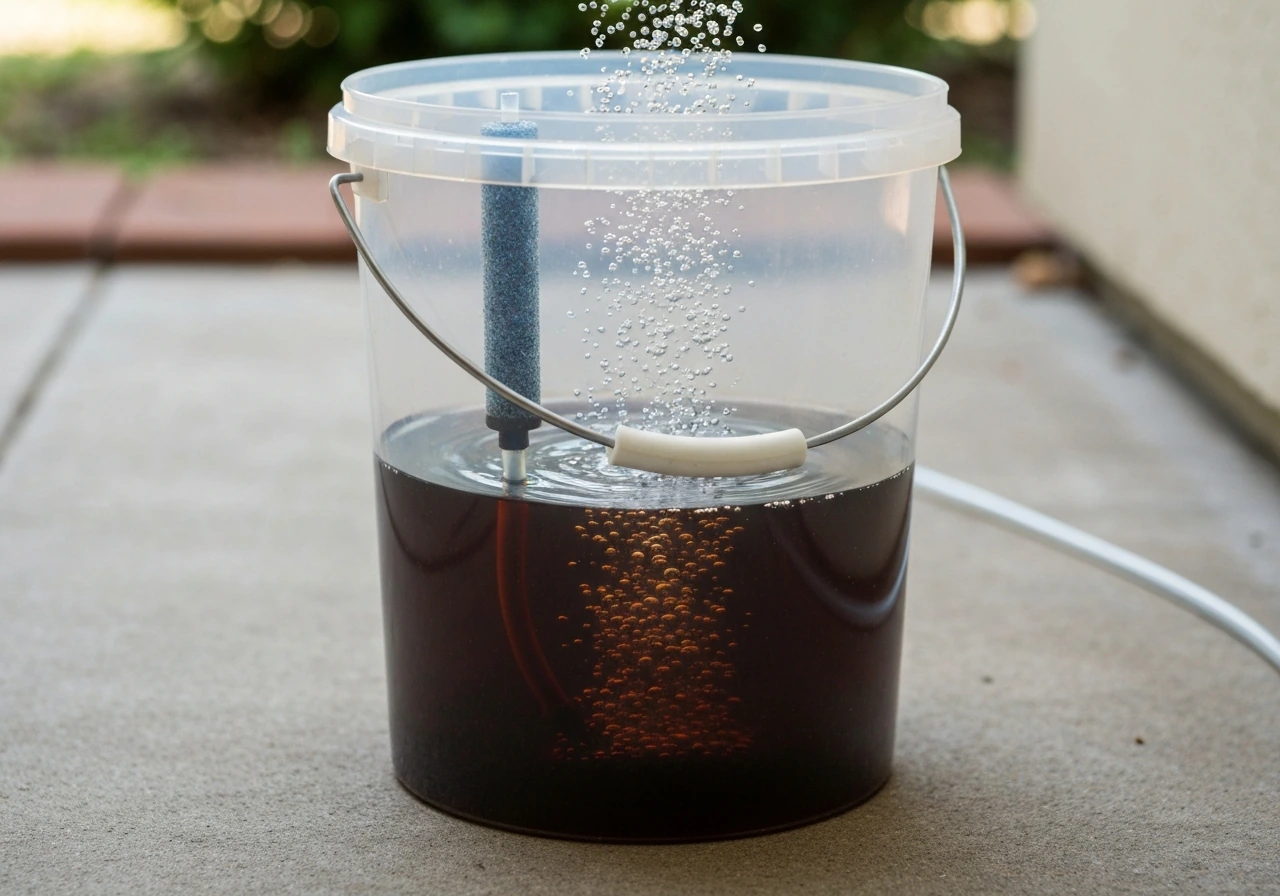
Actively aerated compost tea (AACT) is brewed under aerobic conditions to multiply beneficial microbes. To make a 5-gallon batch: fill a 5-gallon bucket with dechlorinated water (let tap water sit 24 hours or use a bubbler), add 1 to 2 cups of quality worm castings or finished compost, add 1 tablespoon of unsulfured molasses (food for microbes), and run an aquarium pump with air stones for 24 to 36 hours. The water should look bubbly and smell earthy-sweet, not foul.
Strain through a fine mesh cloth before use. Apply within 4 hours of finishing the brew, either as a soil drench or, early in veg only, as a foliar spray. Never apply unfinished or foul-smelling tea, and do not apply foliar tea close to harvest for food safety reasons. If your tea smells like sewage, dump it and start over.
Organic IPM: Preventing Pests and Diseases Before They Start
Organic grows are not immune to pests and disease. The difference is your intervention toolkit and how proactively you manage the environment. Prevention is always easier than treatment.
Preventive Practices
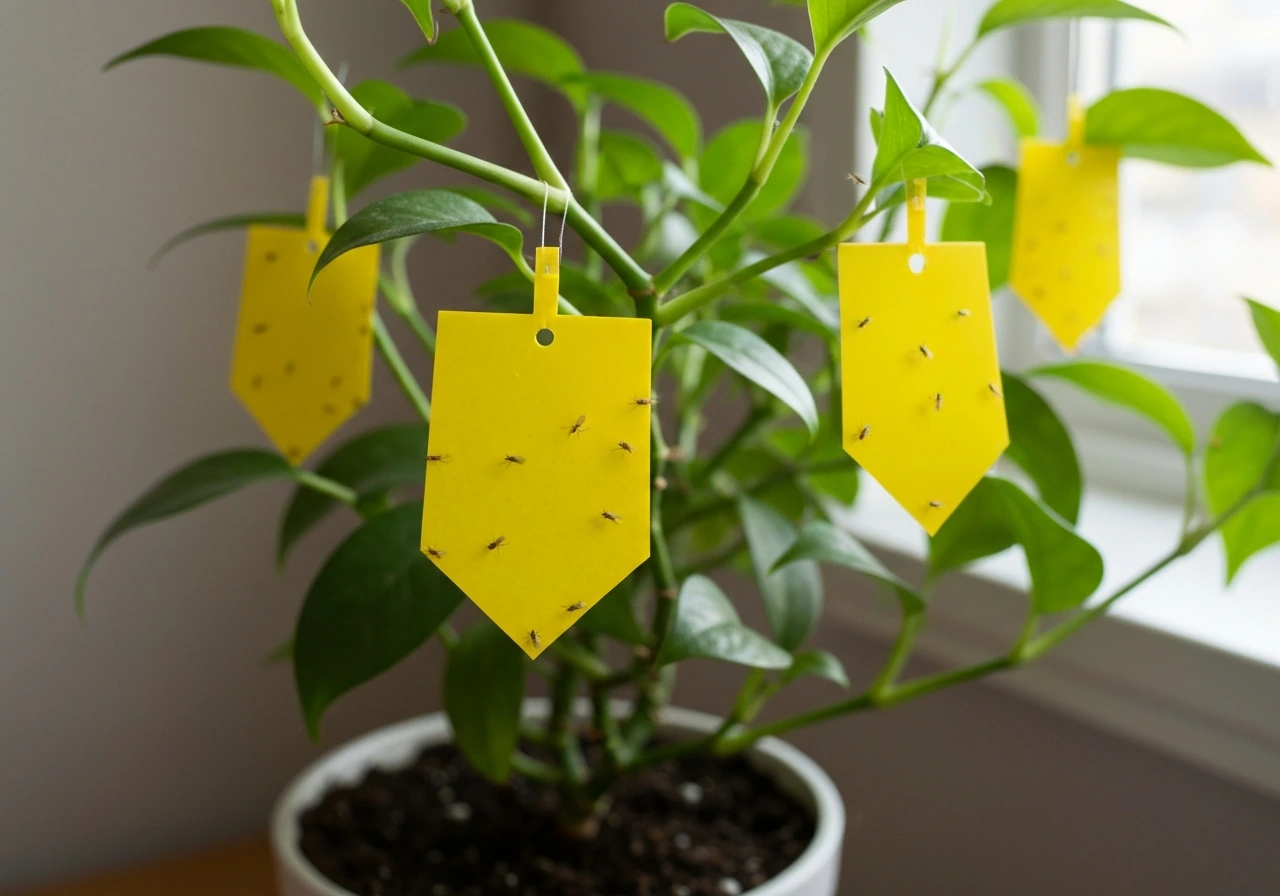
- Hang yellow sticky traps at canopy level from day one. They catch fungus gnats, thrips, whiteflies, and aphids early so you know what you are dealing with before a population explodes. Check and replace them weekly.
- Keep humidity controlled: 60 to 70% RH during veg, dropping to 40 to 50% RH in early flower, and ideally 40 to 45% in late flower to prevent bud rot and powdery mildew.
- Maintain airflow with an oscillating fan at plant level and ensure your exhaust fan keeps a slight negative pressure in the space. Still air is where mold and pests thrive.
- Avoid overwatering. Wet soil is a fungus gnat nursery. Water only when the pot feels light or the top 1 to 2 inches of soil are dry.
- Inspect plants twice a week, including the undersides of leaves where spider mites and aphids hide.
- Quarantine any new clones for 1 to 2 weeks before introducing them to your grow space.
Common Problems and Organic Interventions
| Problem | Early Signs | Organic Intervention |
|---|---|---|
| Fungus Gnats | Adults on sticky traps, larvae in soil | Let soil dry more between waterings; top-dress with sand layer; apply Bacillus thuringiensis israelensis (Bti) drench (OMRI listed) |
| Spider Mites | Tiny dots on leaves, fine webbing underneath | Spray with insecticidal soap (potassium fatty acids) or neem oil solution (2–4 ml per liter) every 3 days for 2 weeks |
| Powdery Mildew | White powdery patches on leaves | Improve airflow and drop humidity immediately; spray with dilute potassium bicarbonate solution or dilute milk (30% milk / 70% water) every 3 to 4 days; remove affected leaves |
| Aphids | Clusters on new growth, sticky honeydew | Blast off with water first; apply insecticidal soap spray; introduce ladybugs or lacewings if possible |
| Bud Rot (Botrytis) | Gray fuzzy mold inside dense buds | Remove affected material immediately with clean scissors; drop RH below 45%; increase airflow; no chemical fix once inside buds |
| Nutrient Deficiency in Organic Soil | Yellowing, purple stems, slow growth | Check pH first (6.0–7.0 for soil); apply worm casting tea or fish hydrolysate; top-dress kelp or blood meal for nitrogen; patience, as organic release is slower |
A quick note on neem oil: it is a useful broad-spectrum OMRI-listed tool in veg and early flower, but stop using it by week 3 of flower. Neem has a strong flavor that can transfer to buds, and late applications can negatively affect smoke quality. Switch to potassium bicarbonate, insecticidal soap, or spinosad (OMRI listed, use sparingly) if you need intervention in flower.
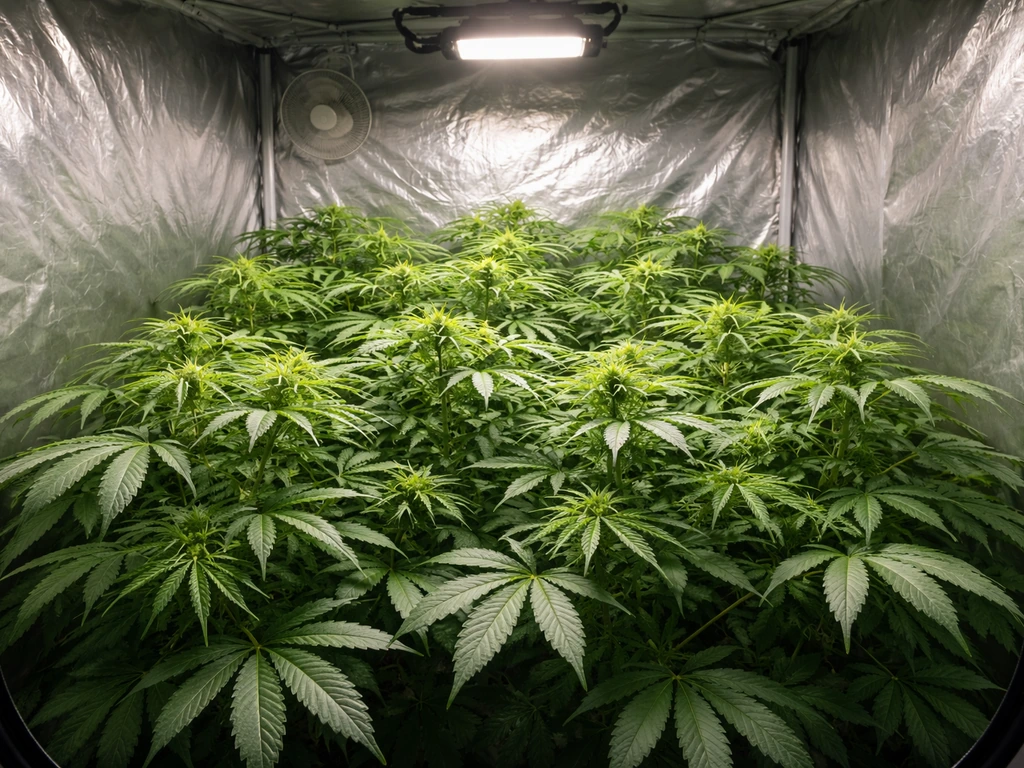
Indoor vs Outdoor Organic Grows: Environment and Workflow
Indoor Organic Grow Targets
Indoor growing gives you full control over every variable, which is especially useful for organic soil management where you control the inputs precisely. If you want to see indoor weed routines in action, search YouTube for “how to grow weeds at home indoor” to compare setups and learn what works for your space how to grow weeds at home indoor youtube. Here are the environmental targets to hit:
| Stage | Temperature (°F) | Humidity (RH) | Light Schedule |
|---|---|---|---|
| Seedling | 72–78°F | 65–70% | 18 hrs on / 6 hrs off |
| Vegetative | 70–82°F | 50–70% | 18 hrs on / 6 hrs off |
| Early Flower (Wks 1–4) | 68–78°F | 40–50% | 12 hrs on / 12 hrs off |
| Late Flower (Wks 5–harvest) | 65–75°F | 40–45% | 12 hrs on / 12 hrs off |
Keep an oscillating fan moving air across the canopy at all times and run your exhaust fan continuously. CO2 levels in a sealed room can deplete during lights-on; fresh air exchange solves this without extra CO2 supplementation for most home setups. Monitor your temperature and humidity with a digital thermometer/hygrometer placed at canopy level, not up near the light.
Outdoor Organic Grow Workflow
Outdoors, your living soil really shines because you have access to natural biology, rain, and seasonal light cycles. Plant after your last frost date when nights stay above 50°F consistently. Position plants in full sun (6 or more hours of direct sun per day). Photoperiod strains will veg naturally through summer and begin flowering as day length shortens in late summer, typically triggering around the summer solstice's reversal. Outdoor plants can get very large, so top or LST (low-stress train) early in veg to manage height and create more bud sites.
Remember to comply with your state's visibility and enclosure requirements. If your state requires plants to not be visible from public spaces (as Virginia does) or requires a 6-foot privacy fence (as Maine does for medical), build that infrastructure before you plant, not after a neighbor spots your canopy. Outdoor plants are also more exposed to pests and weather, so increase your monitoring frequency and keep a few organic IPM sprays on hand as a precaution.
Watering Rhythm
Organic soil needs a wet-dry cycle to encourage root oxygen and microbial activity. Water thoroughly until runoff comes out the bottom, then wait until the top 1 to 2 inches of soil are dry and the pot feels noticeably lighter. In containers, this is typically every 2 to 3 days in veg and every 1 to 2 days in late flower when the plant is drinking more. Use water that has sat out overnight to off-gas chlorine, which can harm beneficial soil microbes. Target pH of 6.2 to 6.8 for soil-based organic grows.
Harvest, Drying, Curing, and Storing Your Organic Buds
Knowing When to Harvest
The most reliable harvest indicator is trichome color, checked with a jeweler's loupe (30x) or a digital microscope. Clear trichomes mean the plant is not ready. Cloudy/milky white trichomes signal peak THC. Amber trichomes indicate THC is degrading into CBN, which produces more of a body/sedative effect. Most growers harvest when trichomes are mostly cloudy with 10 to 20% amber for a balanced effect. You can also watch pistil color: when 70 to 90% of white hairs have darkened and curled in, the plant is close. Use both methods together for the most accurate read.
Drying Your Harvest
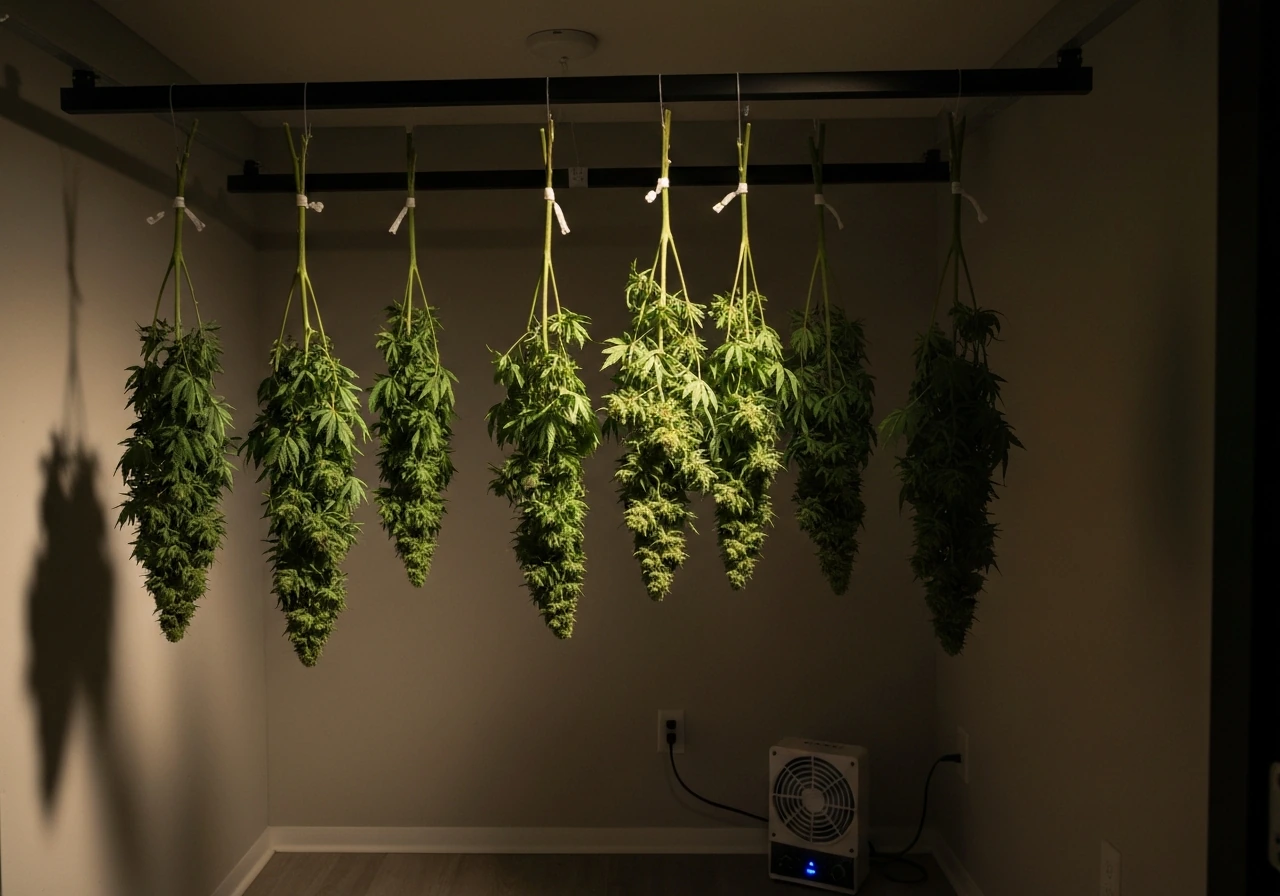
After harvest, hang whole branches upside down in a dark room with temperature at 60 to 68°F and relative humidity at 55 to 65%. Good airflow (not blowing directly on buds) is essential to prevent mold. Grow Weed Easy recommends keeping indoor humidity around 40, 50% in early flowering to reduce mildew and mold risk prevent mold. Do not use a dehumidifier cranked all the way down or place buds in front of a fan: fast drying at high temperatures degrades terpenes and gives you harsh, hay-smelling buds. Slow drying at these targets over 7 to 10 days produces the best results. The buds are ready for curing when small stems snap cleanly instead of bending.
Curing for Quality
Curing is what takes good buds to great buds. Trim your dry buds (or wet-trim right after harvest if you prefer), then place them loosely in wide-mouth glass mason jars, filling each jar about 75% full. For the first week, open the lids twice a day for 5 to 10 minutes to let moisture equalize and fresh air in: this is called burping.
If you detect ammonia smell when you open a jar, leave the lid off for an hour and check for mold. After the first week, burp once a day for another week, then once every few days. A 2-week minimum cure makes a noticeable difference. A 4 to 8 week cure transforms the flavor and smoothness noticeably.
Boveda or Integra 62% humidity packs in jars during curing and storage help maintain ideal moisture.
Long-Term Storage
Store your cured buds in airtight glass jars in a cool (60 to 70°F), dark location away from UV light, heat sources, and humidity swings. Properly stored organic cannabis retains flavor and potency well for 6 to 12 months. UV light and heat are the biggest degraders of cannabinoids and terpenes over time. Avoid plastic bags for long-term storage as they allow static and air exchange.
Your Next Steps Right Now
Here is a practical starting sequence you can execute today, in order: If you are also creating how to grow weed videos, capture each step in order and show your setup, timing, and results clearly so viewers can follow along practical starting sequence.
- Verify your local home cultivation laws and plant limits before purchasing anything.
- Decide on your method: start with standard organic soil in fabric pots if this is your first grow.
- Choose a beginner-friendly, feminized strain with a flowering time under 9 weeks and mold-resistant genetics.
- Order seeds from a reputable seed bank (feminized photoperiod or autoflower).
- Source your organic inputs: a quality organic potting mix, worm castings, kelp meal, a basic OMRI-listed liquid nutrition line (fish hydrolysate and liquid kelp), and perlite.
- Set up your space (tent, light, fan, exhaust) and confirm your environmental targets are achievable before seeds arrive.
- Germinate using the paper towel method at 70 to 80°F and transplant once the taproot appears.
- Hang yellow sticky traps from day one and commit to twice-weekly plant inspections.
- Follow the feeding schedule by stage, water on a wet-dry cycle, and keep your environment dialed in.
- Track your grow in a simple notebook: watering dates, feeding dates, any pest sightings, and photos every few days. This makes troubleshooting on future runs much easier.
Organic cannabis growing has a genuine learning curve, but the fundamentals are straightforward once you understand that you are growing soil as much as you are growing a plant. If you want to explore complementary approaches, the veganic growing method takes organic principles even further by eliminating animal-based inputs entirely. how to grow veganic weed veganic growing method. And if you are curious about speeding up your timeline, there are techniques worth exploring once you have a successful run under your belt. Start simple, stay consistent, and your first organic harvest will teach you more than any guide can.
FAQ
Does “organic” mean USDA Organic certification for homegrown cannabis?
If you mean indoor, organic is usually a living-soil or amended-potting-mix grow, not certification. Use OMRI-listed inputs, avoid synthetic salts, and manage soil moisture and runoff consistently. If you mean “USDA Organic” certified, cannabis cannot legally be certified or labeled because federal control prevents the USDA process for this crop.
How do I know when to feed in an organic grow, so I do not overdo it?
A good rule is to let the first true problem appear before you add anything. Start with a pre-amended mix, then only top-dress nitrogen-forward inputs during early veg if leaves look pale or growth stalls. In flower, avoid blanket feeding and rely on the bloom transition amendments, then stop top-dressing 2 to 3 weeks before harvest to prevent late nutrient buildup.
Can I train or transplant autoflowering plants in an organic setup without hurting them?
Autoflowers tolerate mild, careful handling, but they are still sensitive to stress. Avoid transplanting more than necessary, and if you do transplant, keep the root ball intact, use a new hole in the same depth, and water gently with pH-adjusted water to settle the plant within 24 hours. If you want to be extra safe, germinate directly in the final container.
What should I check first if my organic cannabis looks deficient or slow?
Organic grows can look “nutrient deficient” for reasons other than lack of fertilizer, like underwatering, pH drift in coco, or low oxygen from chronically wet soil. Check whether the top 1 to 2 inches of soil has dried between waterings, confirm pH is in the right range for your medium, and only then adjust amendments.
Are organic weed grows still able to manage pests late in flower?
Yes, but choose the right approach to avoid inconsistent results. If you use living soil, keep your amendments and microbial life consistent and avoid heavy chemical interventions. If you use neem, stop by week 3 of flower to protect smoke quality, and for late pest pressure use alternatives the guide already mentions sparingly, then remove heavily affected leaves if needed for airflow.
Can I reuse soil from an old organic grow for my next run?
Reuse is the biggest mistake. For seed-starting mixes, do not reuse because damping-off organisms can persist. For mature soil, you can sometimes recycle if it is fully recharged, but you need to remove compacted roots, refresh with compost and castings, and re-amend. For first runs, use fresh mix or a clearly “re-amended” blend to reduce variability.
Should I flush organic cannabis before harvest, and what does that actually mean?
In organics, “flushing” is not the same as removing chemicals, it is about letting the plant use stored nutrients. The practical decision aid is to stop top-dressing 2 to 3 weeks before harvest, then do light plain-water watering only (do not suddenly saturate dry soil). This helps avoid excess residual salts from amendments.
What is the easiest organic method for beginners, and what is the hardest part to watch?
If you want predictable results, pick a medium that matches your cleanup comfort. For beginners, fabric pots with amended organic soil are easiest. If you choose organic hydro in coco, keep it clean because biofilm risk rises with reservoirs, and you must be diligent about pH (coco range) and system hygiene.
How can I tell if my dry and cure process is going wrong?
Slow drying with airflow but no direct fan on the buds is the safest target. If buds feel dry on the outside but stems do not snap, they likely need more time before curing. If they dry too fast and turn hay-like early, curing will not fully fix terpene loss. Use the snap test plus aroma assessment (should be grassy-sweet, not sharp ammonia-like).
My jars smell strange during burping. What should I do?
A fresh, slightly sweet earthy smell during the first jar burp period is normal. Ammonia odor is the decision point, it often means moisture is trapped too long or microbes are still active. If you smell ammonia, keep the jar open briefly, check for visible mold, and if necessary reduce jar fill level and adjust drying time before continuing.
Next Article
How to Grow Weed Faster: Stages, Setup, and Fixes
Grow cannabis faster with step-by-step setups, light and climate tuning, feeding, training, and stall troubleshooting fo