You can realistically go from seed to harvest in about 10–12 weeks with a fast autoflowering strain indoors under an 18-hour light schedule. Photoperiod strains take longer, typically 4–6 months total, but you can shave weeks off either timeline by dialing in your environment, feeding your plants correctly, and not making the common mistakes that stall growth. This guide walks you through exactly what to do, stage by stage, so you can get the fastest healthy growth possible wherever you're growing.
How to Grow Weed Faster: Stages, Setup, and Fixes

Marcus Holbrook
27 Apr 2026
How fast does cannabis actually grow? Realistic timelines by stage
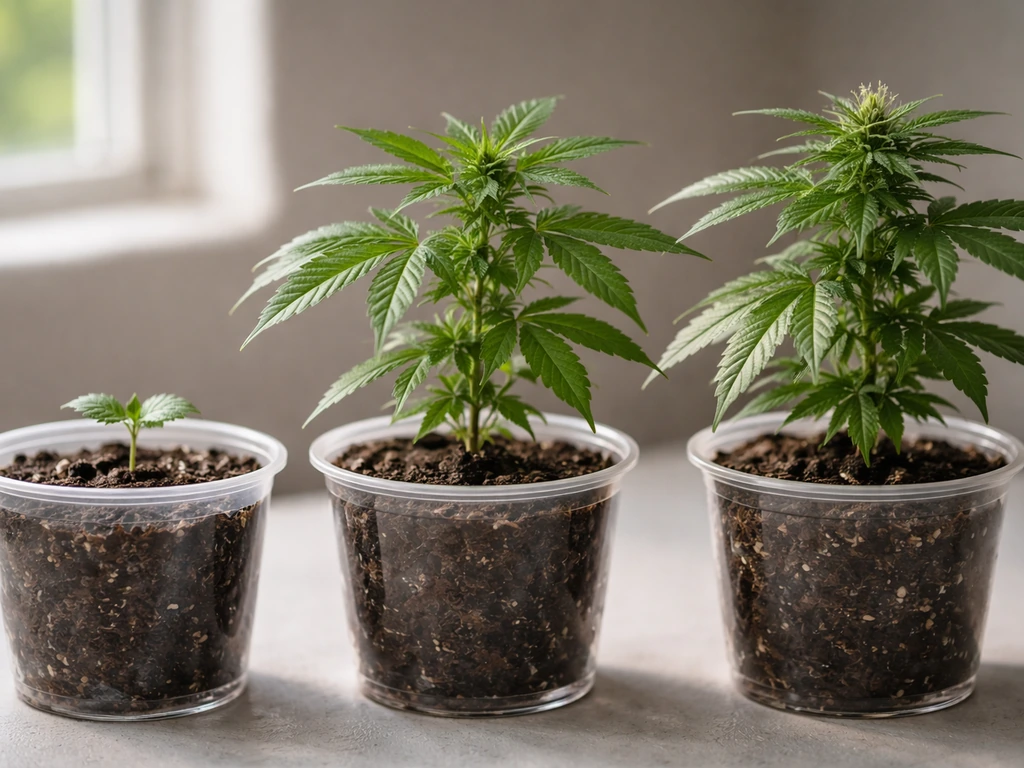
Before you try to speed anything up, it helps to know what a normal timeline looks like. A lot of new growers expect magic, and when they don't get it, they start making changes that actually slow things down. Here's a realistic breakdown of the main stages after germination.
| Stage | Typical Duration | What's Happening |
|---|---|---|
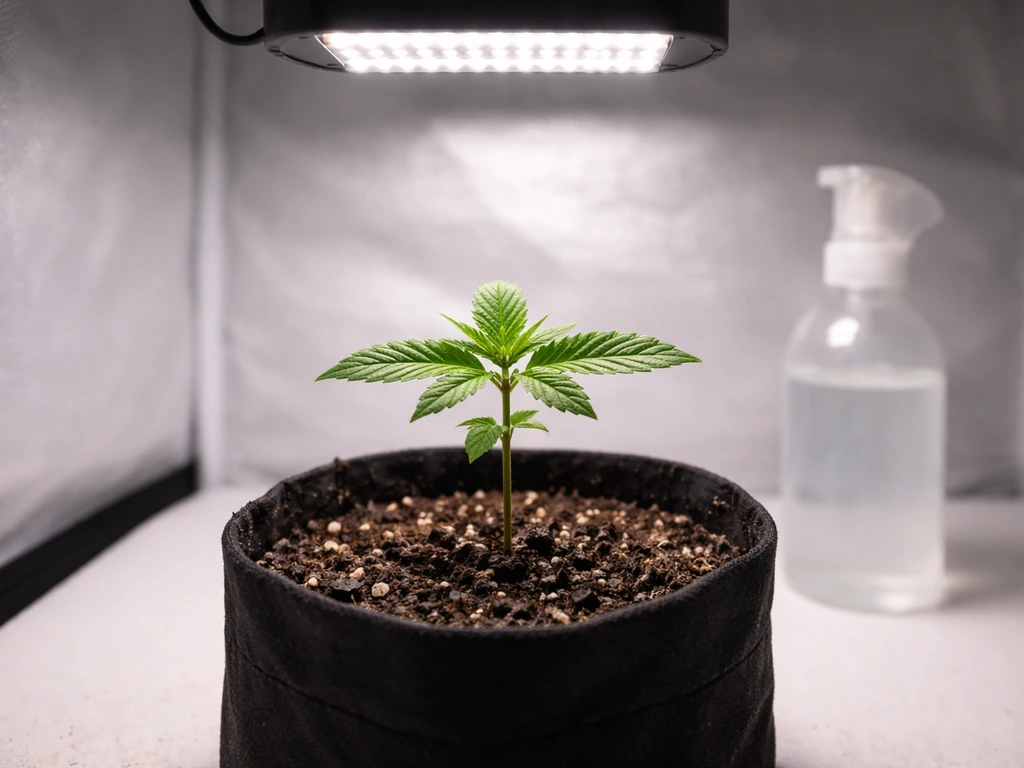
| Seedling | 2–3 weeks | First leaves develop, roots establish, plant is fragile |
| Vegetative | 2–8 weeks (indoor photoperiod) | Rapid stem and leaf growth, root zone expands |
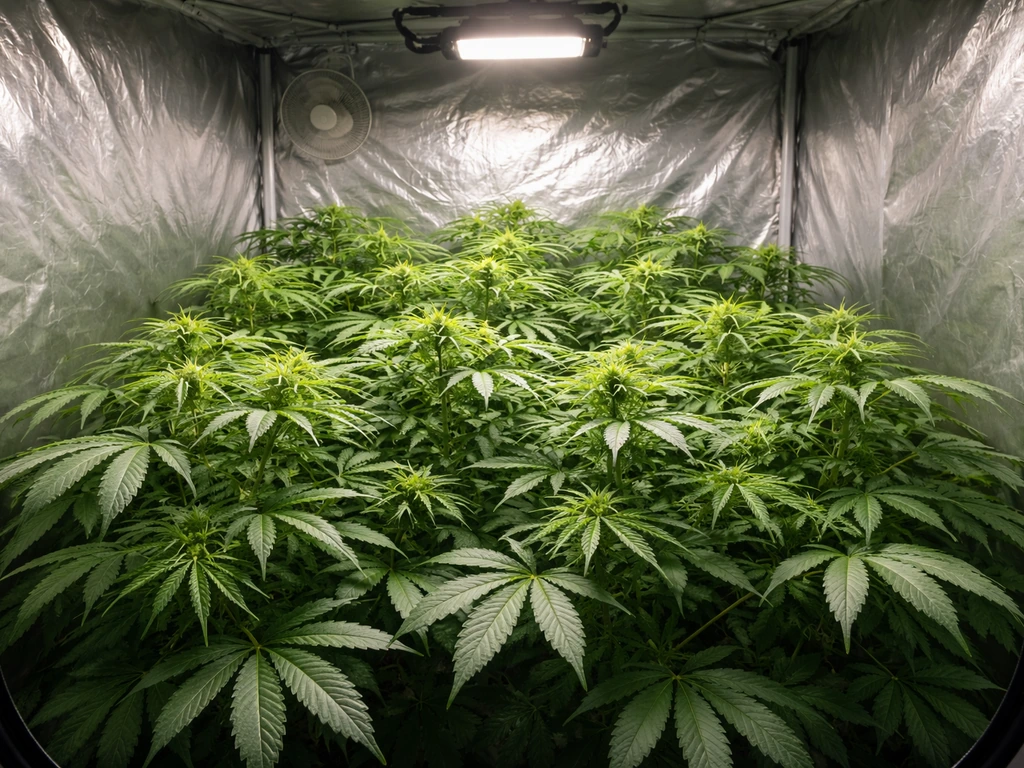
| Flowering (photoperiod) | 8–11 weeks | Buds form and fatten, triggered by 12/12 light schedule |
| Flowering (autoflower) | Included in ~10–12 week total | Begins automatically regardless of light schedule |
| Full cycle (autoflower) | 10–12 weeks, sometimes 13–14 | Seed to harvest, shorter veg built into timeline |
| Full cycle (photoperiod) | 4–8 months total | Depends on how long you run veg before flipping to 12/12 |
The vegetative stage is where you have the most control over total grow time. With a photoperiod plant indoors, you decide when to flip to 12/12 and trigger flowering. Run veg for just 3–4 weeks and you get smaller plants with smaller yields but a faster finish. Run it for 8 weeks and you build a bigger canopy that produces more at harvest. Autoflowers remove that decision entirely since they flower on their own schedule, which is why they're the go-to choice when speed is the priority.
What actually makes weed grow faster
Cannabis grows faster when it can photosynthesize efficiently, breathe through its roots, and process nutrients without stress. That sounds obvious, but most slow-growth problems come down to one of four things: not enough usable light, poor root-zone conditions, wrong temperature or humidity, or nutrient imbalances. Fix those four things and you'll see a noticeable difference.
- Light intensity and duration: More photons hitting leaves means more photosynthesis. The Daily Light Integral (DLI) is the most useful way to think about this. During veg, you want to hit around 17–40 mol/m²/day depending on strain and stage. During flowering, 35–60 mol/m²/day is the target range. Autoflowers on an 18-hour schedule naturally get more DLI than photoperiods on 12/12.
- Root-zone oxygen: Roots need oxygen to take up water and nutrients. Overwatering, compacted soil, and poorly draining media all suffocate roots and bring growth to a crawl.
- Temperature: The sweet spot for most cannabis in veg is 70–85°F (21–29°C). Drop below 60°F or push above 90°F and growth slows noticeably.
- VPD (Vapor Pressure Deficit): This is the relationship between temperature and humidity. Target 0.8–1.0 kPa in veg and 1.1–1.3 kPa in late flower. Too far outside that range and plants close their stomata, which halts gas exchange and slows growth.
- Strain selection: Autoflowers and fast-flowering photoperiod strains are genuinely faster. Choosing the right genetics is the single biggest time-saver available to you.
Speed-up setup for beginners: lights, temperature, airflow, and humidity
Getting the environment right is the lowest-effort, highest-return thing you can do as a beginner. You don't need expensive gear. You need correctly set up gear.
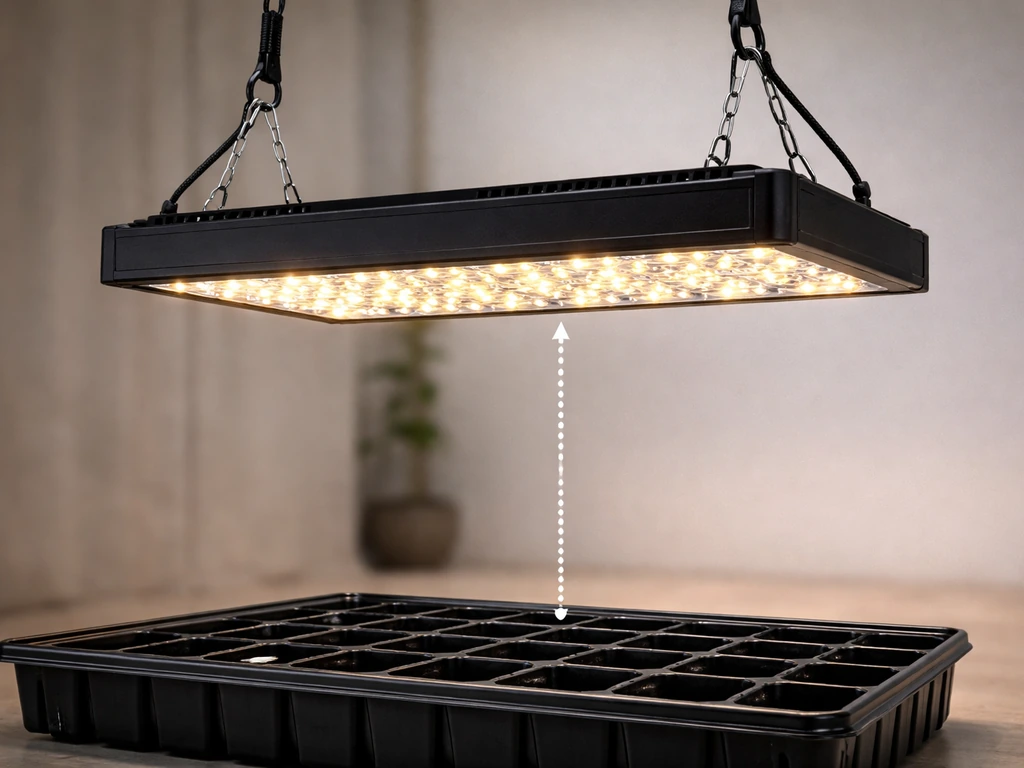
Lights
For indoor growing, a quality LED with a manufacturer-recommended hanging distance is your best starting point. Start with lights at the higher end of the recommended distance range, then gradually move them closer as plants mature and you confirm there's no light stress. Signs of too-close LEDs include bleached or yellowing tops, tight internodal spacing that looks more like stress than vigor, and in severe cases, foxtailing buds in flower. During veg on a photoperiod strain, run 18 hours on and 6 hours off. For autoflowers, keep it at 18–20 hours on throughout the entire grow. When you're ready to flip a photoperiod to flower, switch to 12 hours on and 12 hours of uninterrupted darkness.
Temperature and humidity
Keep your grow space between 70–85°F (21–29°C) with lights on during veg. In flower, dialing back slightly to 65–80°F helps with resin production and terpene preservation. Nighttime temps shouldn't crash more than 10–15°F below daytime temps or you risk slowing metabolic processes. For humidity, target around 60–70% RH during seedling and early veg, 40–60% in mid-to-late veg, and 40–50% in early flower dropping to 30–40% in late flower. The goal is hitting those VPD ranges mentioned above, and a $10–15 digital thermometer/hygrometer combo lets you monitor both in real time.
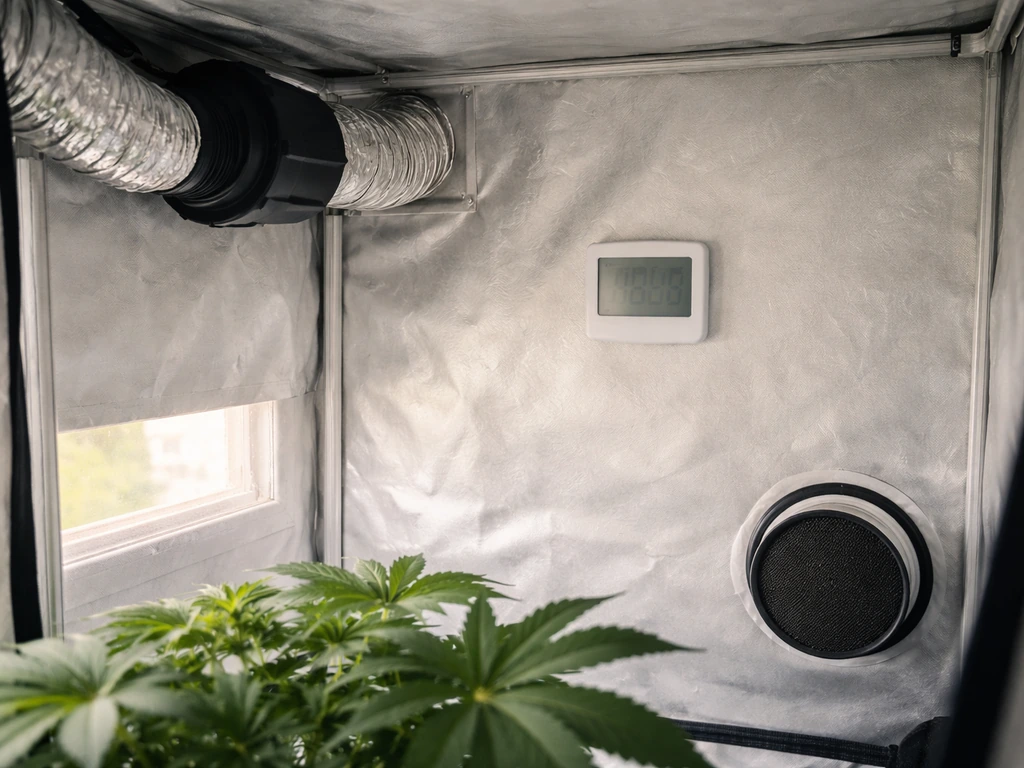
Airflow
Good airflow does three things: it keeps CO2 replenished around leaves, it prevents hot spots and stagnant humid air that invites mold, and gentle oscillating fans strengthen stems (which is called 'thigmomorphogenesis' but you don't need to remember the word, just the concept). Run an oscillating fan pointed to move air around plants, not directly blasting them, and exhaust stale air out through a carbon filter if you need odor control. Fresh intake should come in low, exhaust should exit high. Beyond odor control, good ventilation is required by many jurisdictions as part of responsible home cultivation, so it's worth getting right early.
Nutrients and feeding to support faster growth
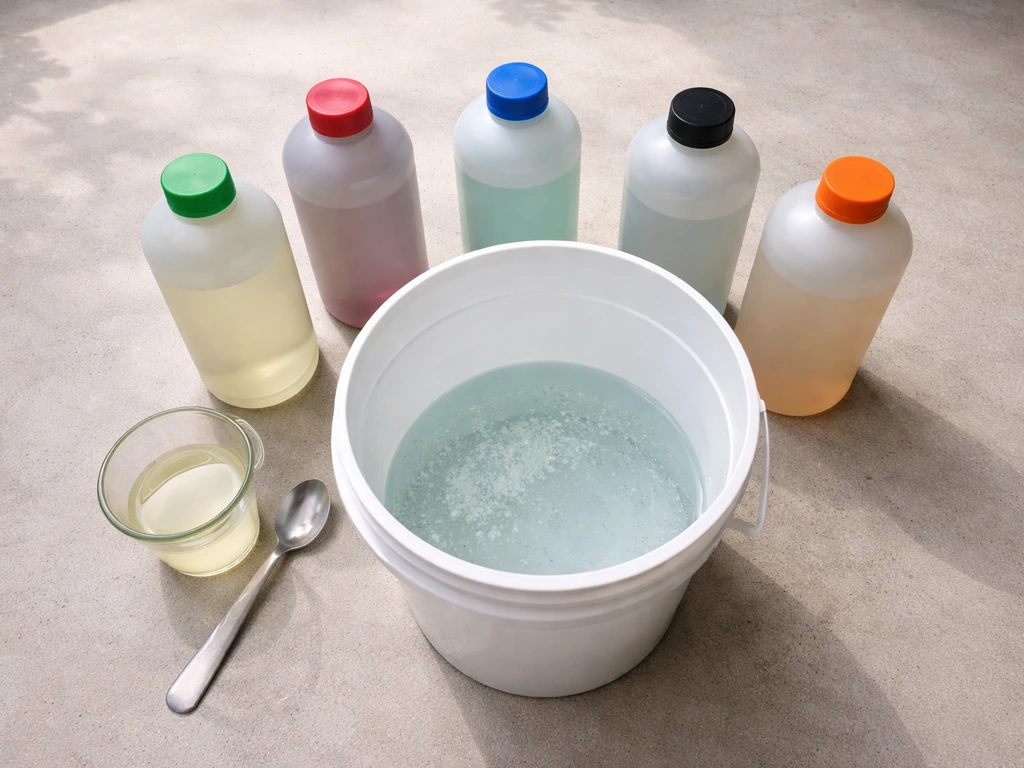
Feeding correctly accelerates growth. Feeding incorrectly is probably the number one reason beginner plants stall. The key insight: nutrient burn from overfeeding causes more problems than slight underfeeding does. When plants are burned, they drop leaf mass, slow photosynthesis, and can go into a kind of stress lockdown. You want to feed aggressively enough to support rapid growth without tipping into toxicity.
Stage-specific feeding approach
- Seedling (weeks 1–3): Very little nutrient input needed. If you're in a quality pre-amended soil, hold off on additional nutrients entirely for the first 2–3 weeks. Overfeeding seedlings is extremely common and causes stunting.
- Vegetative stage: Nitrogen (N) is the main driver of fast vegetative growth. A balanced grow formula with higher N will push stem and leaf development. Start at half the recommended dose and increase gradually while watching for tip burn (the first sign of nutrient excess).
- Flowering stage: Shift to lower-nitrogen, higher phosphorus and potassium (P/K) formulas to support bud development. Many commercial nutrient lines have dedicated 'bloom' formulas for this.
- pH management: This is non-negotiable. In soil, keep root-zone pH between 6.0–7.0, targeting around 6.2–6.8. In hydroponics, keep it 5.5–5.8. Outside these ranges, nutrients lock out even if they're present in the solution, and your plant shows deficiency symptoms that won't fix until you fix the pH.
If you see older lower leaves going yellow and dropping while upper growth looks fine, that's typically a nitrogen deficiency and you should increase N slightly and monitor over 3–5 days. If you see brown crispy tips spreading across multiple leaves, you're likely overfeeding and should flush with plain pH-corrected water and reduce dose. Brown spotting near leaf serrations combined with other symptoms often points to pH being off rather than a specific nutrient shortage.
Training and growth management: get more from the same time
Training techniques don't literally make individual cells divide faster, but they make your plants produce more in the same timeframe by improving light distribution and creating more bud sites. Done right, training is one of the best tools you have for maximizing what a grow cycle actually delivers.
Topping
Topping means cutting off the main growing tip to force the plant to develop two main branches instead of one dominant cola. It causes a short slowdown of a day or two while the plant redirects energy, then growth accelerates across both new shoots. Top once plants have 4–6 nodes and have shown healthy, vigorous growth. Don't top during stress, illness, or the first few days after transplant.
Low Stress Training (LST)
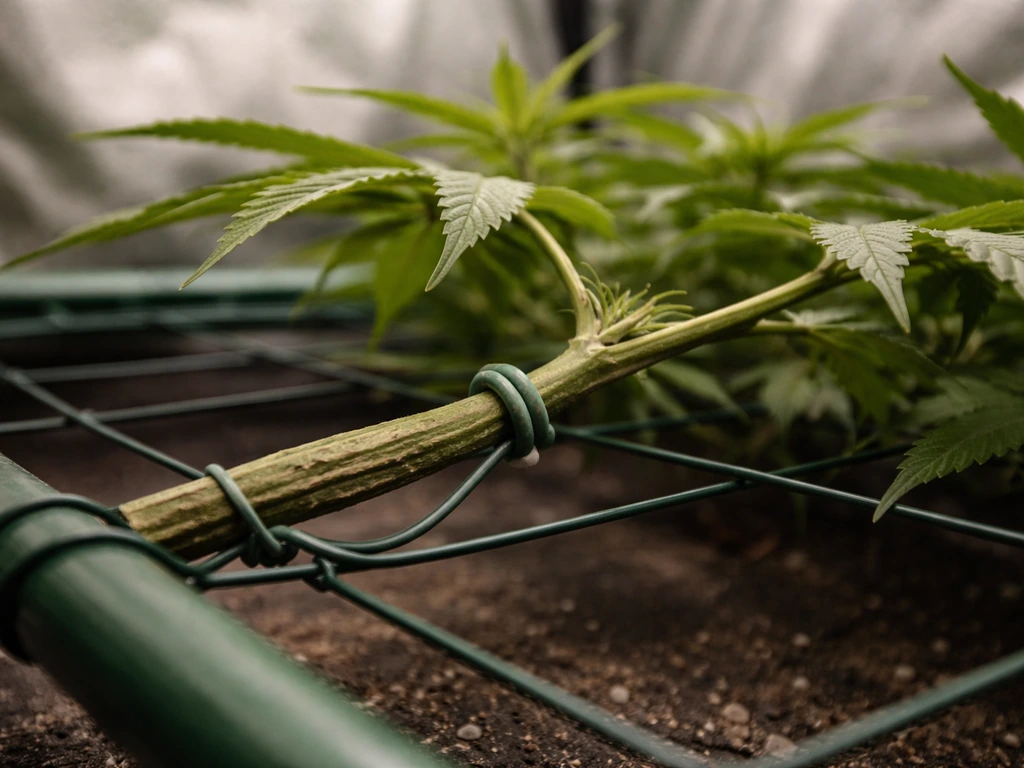
LST involves gently bending and tying branches outward and downward to create a flat, even canopy. This puts more bud sites at the same distance from the light, which means more of the plant benefits from high-intensity light. It's the most beginner-friendly training method because it doesn't involve cutting anything, the risk of stressing plants is low, and you can adjust ties daily as the plant grows. Start LST early in veg when stems are still flexible.
Pruning and defoliation
Removing lower branches that receive no light (called 'lollipopping') redirects energy to productive upper bud sites. Defoliation, where you selectively remove larger fan leaves to improve light penetration, is more advanced and carries real risk if done too aggressively. For your first grow, skip heavy defoliation in flowering entirely. Instead, focus on removing dead or yellowing leaves and any small branches deep in the canopy that aren't getting light. Strategic defoliation in later grows (for example a targeted pass around week 3 of flower) can improve bud quality, but it's worth building experience first.
Indoor vs outdoor vs hydroponics: which is actually fastest?
Each method has a genuine fastest-route setup, and the right choice depends as much on your situation as on speed alone. Here's a direct comparison.
| Method | Fastest Setup | Typical Speed Advantage | Key Trade-offs |
|---|---|---|---|
| Indoor (soil or coco) | Autoflower + 18/6 LED schedule, 3x3 tent, quality LED, 5-gallon fabric pot | 10–12 weeks seed to harvest with autos; full control year-round | Equipment cost, electricity, odor management required |
| Outdoor | Start seeds indoors in early spring, transplant after last frost, choose fast-flowering photoperiod or auto strain | Lower cost but season-dependent; no artificial light running costs | Depends on climate, daylight hours, security requirements per local law |
| Hydroponics (DWC/RDWC) | Autoflower or photoperiod in deep water culture, 18/6 veg then 12/12 flower, strict pH 5.5–5.8, DO over 6 ppm | Often 20–30% faster growth than soil due to direct root nutrient access | Higher technical demand, pH/EC monitoring daily, more risk of rapid problems |
If speed is your absolute priority and you're growing indoors, hydroponics (specifically Deep Water Culture) consistently produces faster vegetative growth than soil because roots access nutrients directly in oxygenated water. Dissolved oxygen above 6 ppm in the reservoir is the key metric to hit. Keep pH strictly between 5.5–5.8 since nutrient availability is maximized at this slightly acidic range, and monitor it daily because it drifts. The trade-off is that problems in hydro escalate faster than in soil, so beginners should be prepared to check plants every day.
For outdoors, the fastest route is starting autoflowers in a controlled indoor environment during early spring and transplanting once outdoor conditions are right. Outdoor photoperiod plants won't trigger flowering until natural days shorten in late summer, so your timeline is largely set by where you live. If you're growing outdoors, check local regulations carefully since rules around home cultivation vary significantly by jurisdiction and may include limits on plant count, outdoor visibility, or both.
If you're interested in more specialized growing philosophies, organic and veganic growing approaches can complement any of these methods, though they sometimes require longer soil-building lead times before plants benefit. Those approaches are worth exploring once you've got the fundamentals locked in. If you specifically want how to grow veganic weed for faster, cleaner results, use these organic and veganic growing approaches as a foundation before you fine-tune your speed setup.
Troubleshooting when growth stalls
If your plant stops growing or slows dramatically, something in the environment is wrong. The good news is that most causes are fixable within a few days once you identify them. Here's how to work through the most common culprits.
Overwatering
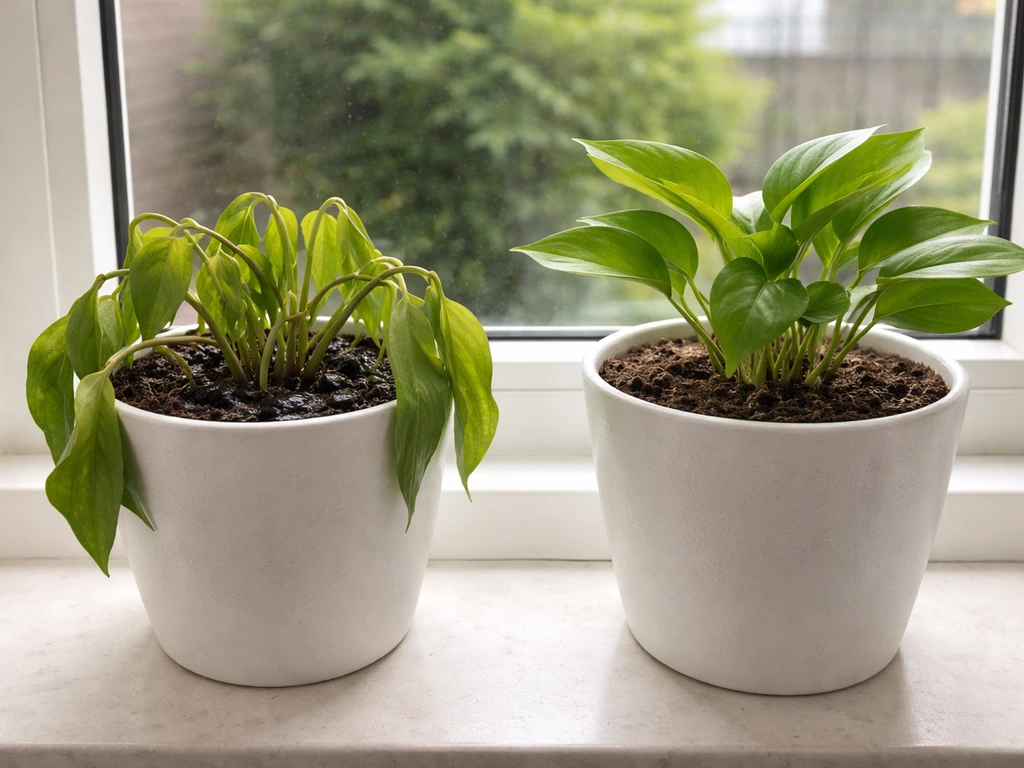
This is the single most common beginner problem. Overwatered plants look droopy with leaves curling downward and feeling heavy and waterlogged. For a gentler, more organic feeding approach, see how to grow organic weed and avoid the overfeeding that can stall growth. Seedlings in oversized pots are especially vulnerable because the roots can't use moisture fast enough and the wet medium suffocates root tips. The fix: let the medium dry out between waterings until you can lift the pot and it feels noticeably lighter, then water thoroughly. In large pots, consider watering only the area immediately around the root zone until plants are bigger.
Underwatering
Underwatered plants also droop, but leaves feel dry and papery rather than firm and bloated. The pot will feel very light. Water thoroughly until runoff appears at the bottom, then observe recovery within a few hours. Consistent underwatering stunts root development and slows overall growth significantly.
Nutrient deficiencies and toxicities
Yellow lower leaves often mean nitrogen deficiency. Burnt tips mean excess nutrients. Brown spots with no clear pattern, especially when combined with discoloration across multiple nutrient types, almost always point to pH being out of range rather than a specific nutrient being absent. Check and correct pH first before throwing more nutrients at the problem. I've wasted more money buying extra nutrients when all I needed was to bring the pH back into range.
Light problems
Bleached or yellowing tops on otherwise healthy plants, especially where growth is most vigorous and closest to the light, usually mean your LED is too close or too intense for the current stage. Move it up by a few inches and see if new growth improves over the next few days. Conversely, if plants are stretching with long gaps between nodes, they need more light or the light needs to come closer. Gradually adjust rather than making large sudden changes, since cannabis can be stressed by sudden increases in light intensity.
Root problems
If you've ruled out watering frequency and nutrients but the plant still looks sick and slow, check the roots. In soil or coco, brown slimy roots with a bad smell indicate root rot, usually caused by overwatering combined with poor drainage. In hydroponics, brown roots and slime mean the reservoir is too warm or lacks oxygen. Fix hydro root issues by dropping reservoir temperature to around 65–68°F, adding an air stone or bigger air pump to boost dissolved oxygen above 6 ppm, and considering a hydrogen peroxide treatment or beneficial bacteria product (like Hydroguard) to clear the infection.
Your fastest-growth checklist to start today
If you want a quick-action starting point, run through this list and fix anything that isn't already in place. This covers the highest-leverage changes you can make right now regardless of your setup. If you also want to document your progress, the next step is learning how to grow weed videos so your setup and results are easy to follow. If you want more practical guidance, search YouTube for how to grow weeds at home indoor to see indoor setups in action how to grow weed videos.
- Choose an autoflowering strain if speed is your main goal. Look for genetics marketed at 10–12 weeks seed to harvest from a reputable breeder.
- Set your indoor light schedule to 18 hours on, 6 hours off for the full cycle on autos, or 18/6 for veg then 12/12 for flower on photoperiods.
- Hang your LED at the manufacturer's recommended distance and use a PAR meter app or DLI calculator to estimate whether your plants are getting enough light.
- Measure and correct pH every time you water. Soil: 6.2–6.8. Hydro: 5.5–5.8.
- Check temperature and humidity at canopy level. Target 70–80°F and VPD of 0.8–1.0 kPa in veg.
- Run an oscillating fan for gentle airflow and vent stale air out through a carbon filter for odor control and fresh air exchange.
- Water only when the top inch of soil is dry and the pot feels lighter. Let roots breathe between waterings.
- Start nutrients at half dose and increase only if plants show signs of deficiency. Back off immediately at the first sign of tip burn.
- Apply LST early in veg to spread the canopy and maximize light exposure to all bud sites.
- Check local laws before setting up your grow. Many jurisdictions have plant count limits, visibility rules, and security requirements for home cultivation.
The fastest grow you'll ever have is one where nothing goes wrong, and nothing goes wrong when the environment is dialed in from day one. You don't need to do everything perfectly, but getting light, water, and pH right from the start will beat any shortcut supplement or secret technique every time.
FAQ
If I want how to grow weed faster, should I change multiple things at once when growth looks slow?
Yes, but the fastest route is to reduce time lost to recovery. Avoid frequent, large changes to light intensity, temperature, humidity, and feeding. Pick one variable to adjust at a time, wait 48 to 72 hours to judge new growth, and keep pH in range. This prevents the “chasing problems” cycle that typically adds weeks.
Can I shorten the timeline by running lights 24/7 or extending the photoperiod further?
No, and it can backfire. Cannabis growth needs energy from light, not just more photoperiod hours. For photoperiod plants indoors, stick to 18 hours during veg and 12/12 only to initiate flowering. For autoflowers, keep 18 to 20 hours on, then avoid extending beyond the upper end because you can increase heat and light stress without meaningful gains.
When exactly should I start feeding harder if my goal is faster growth?
Seedling and early veg generally move faster when you keep roots comfortable and the canopy stable. A common mistake is starting at “full strength” nutrients too early. Use a gentle starter feed or plain water with minimal additives until plants are established, then increase gradually while watching for nitrogen deficiency (older lower yellowing) and nutrient burn (crispy brown tips).
What are the biggest “gotchas” that make hydro harder if I’m trying to grow weed faster?
Hydroponics can be faster, but don’t treat it as a set-and-forget system. In DWC, check dissolved oxygen and temperature daily, and verify pH at least daily because it drifts. If you miss one of those checks, symptoms can escalate quickly, which costs more time than it saves.
How do I tell whether my slow growth is from roots versus lights or nutrients?
Use both root-zone temperature and signs of stress. In soil/coco, if the medium stays wet too long, roots slow down. In DWC, keep reservoir temperature cool, about 65 to 68°F, and maintain aeration so dissolved oxygen stays above 6 ppm. If growth is slow despite good light, suspect root-zone conditions before adding supplements.
If training doesn’t make cells divide faster, how does it actually help with faster flowering or harvest date?
Not directly, because yield and speed depend on overall plant performance. But you can “speed up” usable canopy area by increasing uniform light exposure. That means starting LST early, keeping a level canopy, and avoiding shade under the canopy (lollipopping only the branches that truly get no light).
When is it too early or too risky to top if my goal is the fastest grow?
Yes, especially with topping. Wait until plants have 4 to 6 nodes and are healthy, then top once. Don’t top during illness, transplant shock, or the first few days after changing conditions. If you top too early or while stressed, the brief slowdown becomes a longer recovery period that delays the finish.
My leaves look off, should I increase nutrients or check pH first?
In most cases, you should correct pH first before adding more nutrients. pH problems often show up as brown spotting without a clean nutrient deficiency pattern. Bring pH back into the correct range for your medium, then reassess over the next few days rather than “doubling down” on the nutrient schedule.
How can I avoid the most common watering mistakes when trying to grow weed faster?
Yes, and it depends on the direction of the problem. Droopy, heavy, waterlogged leaves usually mean overwatering, so let the medium dry down between waterings. Droopy, papery dry leaves usually mean underwatering, so water thoroughly until you see runoff. When in doubt, use pot weight as a check, not the calendar.
What are clear signs my LED is too intense or too weak, and how should I adjust it?
For LEDs, start at the higher end of the recommended hanging distance, then move closer only if new growth stays healthy. Signs of too-strong light include bleached or yellowing tops and shortened internodes that look like stress. Signs of too little light include stretching with long gaps between nodes. Adjust gradually, typically over days, not in large jumps.
Which is more reliable for fastest results overall, DWC hydro or soil/coco?
Choose the method that matches your time constraints and maintenance tolerance. If you want speed and can check plants daily, DWC can be faster during vegetative growth. If you want a more forgiving learning curve, soil or coco with consistent watering and pH control may cost a small amount of time but reduces the chance of setbacks that erase the advantage.
If I fix nutrients but growth still stalls, what should I check next in hydro?
Hydroponics and strong lighting can create stress that looks like nutrient problems. If you see rapid deterioration despite correct feeding, immediately check reservoir temperature, dissolved oxygen, and pH (and inspect roots for slime or bad smell). Stabilize the root environment before changing the nutrient recipe.
Do autoflowers grow faster no matter what, or can they still stall like photoperiod plants?
Automatics are often fastest, but they still stall when conditions are wrong. The fastest way with autos is to keep the environment stable from day one (light schedule, correct temps, correct humidity targets, and correct pH). Also, avoid transplanting or repeated root disturbance, because autos have a shorter window to recover.
What simple daily routine helps me actually hit a faster harvest date without causing new problems?
Your quickest “real-world” improvement is to build a daily checklist: lights on/off schedule, thermometer and hygrometer readings, water or reservoir pH and temperature, and a quick root or leaf inspection. If something is off, fix one variable at a time and document changes so you can spot trends before growth losses compound.
Next Article
How to Grow One Weed Plant: Beginner Step-by-Step
Step-by-step guide to grow one cannabis plant: setup, germination, light, feeding, troubleshooting, harvest and curing.