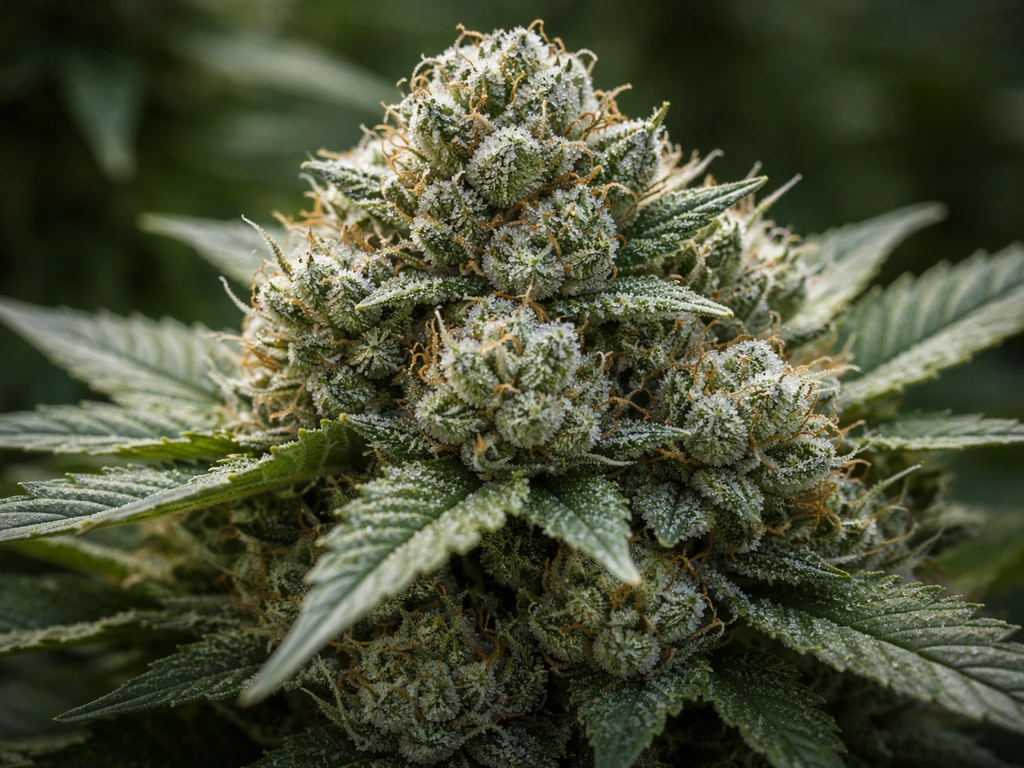
Growing dense buds outdoors comes down to a repeatable combination of strong genetics, generous root space, well-fed soil, smart training, and managing humidity and airflow through the late flowering window. For a step-by-step walkthrough on how to grow buds, see the detailed guide on how to grow buds for practical, seasonal advice. Get those five things right and your outdoor plants will produce tight, heavy, resin-coated colas that rival a lot of indoor harvests. See our full guide on how to grow fat buds for a step-by-step walkthrough of the techniques that produce tight, heavy outdoor colas. Skip one of them and you'll be wondering why your buds are airy and light even after a full season in the sun. For a concise step-by-step checklist that summarizes these techniques, see how to grow big buds fast.
How to Grow Dense Buds Outdoors: Complete Step-by-Step Guide

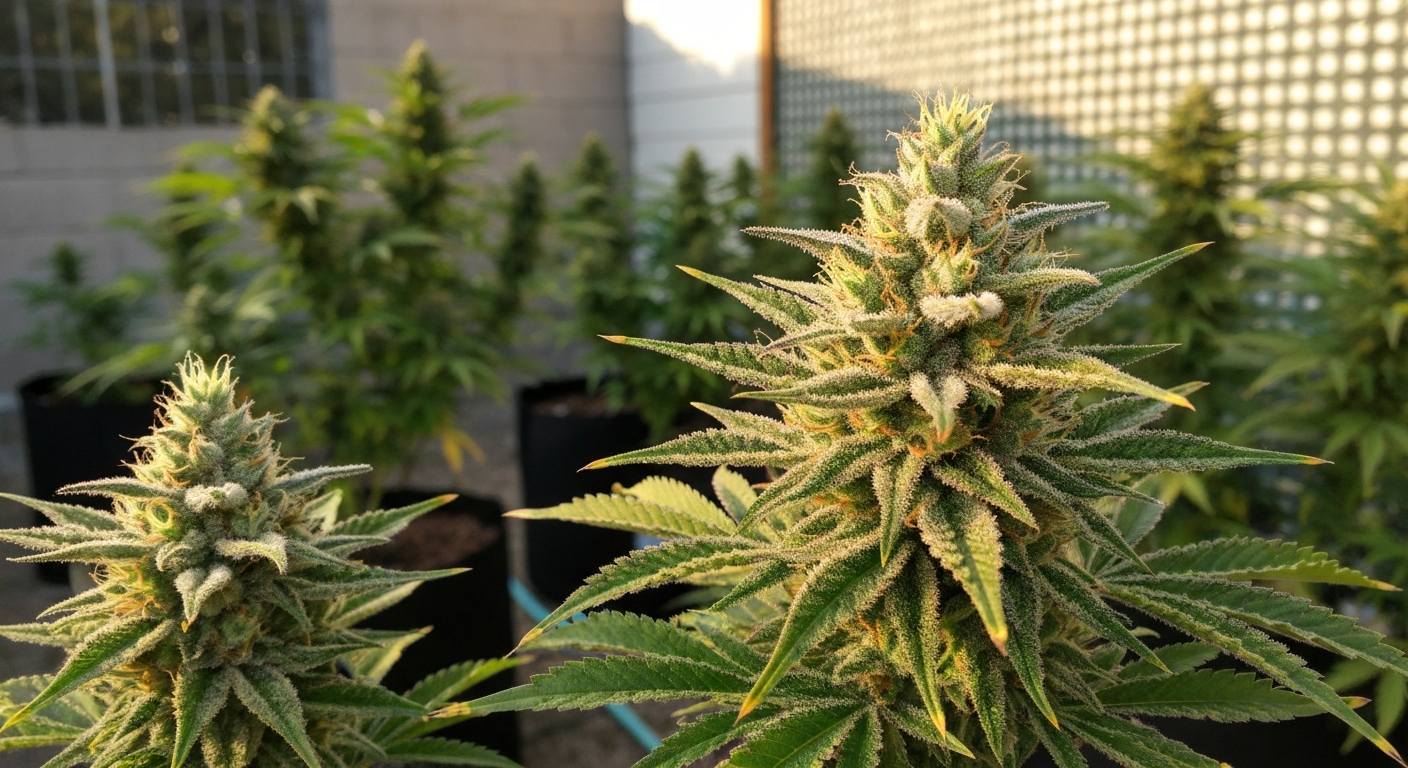
What 'dense buds' actually means and what to expect outdoors
Dense buds are compact, heavy for their size, and covered in visible trichomes. When you squeeze one gently, it springs back with resistance. Airy buds, by contrast, feel light and loose, with visible gaps between calyxes. Density is determined by genetics first, then by how well you managed light, nutrients, training, and humidity from week one through harvest. Outdoors, you have less environmental control than indoors, which means you have to work smarter with site selection, variety choice, and timing. Realistically, outdoor plants in a good climate with solid technique can produce main colas that rival indoor results in density and resin content. In a marginal climate, you're still capable of very good results, but managing humidity and maximizing direct sun hours becomes the deciding factor.
I want to be honest here: your first season outdoors probably won't be perfect. I made every classic mistake, from undersized containers to ignoring early signs of bud rot. This guide is designed to short-cut your learning curve with techniques that are backed by real growing data, not just forum lore.
Legal and compliance reminders before you start
Cannabis cultivation laws differ enormously depending on where you live. In some jurisdictions, home growing is fully legal with a plant-count limit; in others it remains prohibited regardless of use. Before you germinate a single seed, you need to know your local rules. This is not a formality: outdoor grows are visible to neighbors, delivery drivers, and in some areas, aerial surveillance. Getting this wrong has real consequences.
- Check your national, state/provincial, and municipal laws for the maximum number of plants allowed per person or per household.
- Confirm whether flowering or mature plants count separately from seedlings in your jurisdiction.
- Understand setback rules: many legal jurisdictions require plants to be a minimum distance from schools, parks, or property boundaries.
- Privacy screening is often legally required, not just recommended. Know the specific requirements in your area.
- Keep documentation of legal seed or clone purchases where receipts or certificates of analysis may be required.
- Consult a local legal resource if you are uncertain. Nothing in this guide constitutes legal advice.
The outdoor tips in this guide are written for growers operating in jurisdictions where home cultivation is legal. If your location has any ambiguity around legality, please resolve that before proceeding.
Choosing genetics: strains built for density
Genetics set the ceiling. No amount of nutrients or training will make a naturally wispy sativa-dominant strain produce the same bud structure as an indica-leaning variety bred specifically for tight calyxes and heavy resin. For outdoor growing aimed at dense buds, you want to prioritize strains with short internodal spacing, a compact bud structure, and a flowering window that finishes before your regional autumn rains and humidity arrive.
Feminized photoperiod vs autoflowering varieties
Feminized photoperiod strains are triggered to flower by the natural shortening of days as summer turns to autumn. They give you a long vegetative period to train and size up the plant before flowering begins, which typically means more bud sites and a heavier total yield. They are generally the better choice if you want maximum density and are willing to manage a longer season. Autoflowering varieties flower on a timer set internally by the plant, regardless of light hours. They finish faster (often 70 to 90 days from seed) and are excellent for growers in short-season climates or those who want a quick harvest. The tradeoff is that auto genetics historically produce somewhat less dense buds than the best photoperiod indica hybrids, though modern autoflower breeding has closed this gap significantly.
| Trait | Feminized Photoperiod | Autoflowering |
|---|---|---|
| Flowering trigger | Shortening day length (approx. 12–14 h dark) | Internal timer, ~3–5 weeks from seed |
| Veg period | Grower-controlled, typically 6–12 weeks outdoors | Fixed, ~3–4 weeks |
| Training flexibility | High: topping, LST, SCROG all practical | Limited: avoid heavy HST after week 3 |
| Bud density potential | Very high with right indica-hybrid genetics | Good to very good with modern genetics |
| Season length | Full season (Apr/May start, Sept/Oct harvest) | 60–90 days any time in warm season |
| Best for | Growers with full growing season and space | Short seasons, quick cycles, beginners |
My recommendation for beginners chasing dense outdoor buds: start with a feminized, indica-dominant hybrid from a reputable breeder. Look for strains with 'Big Bud,' 'Northern Lights,' 'Critical,' or 'OG Kush' lineage in the name or breeder notes. For a step-by-step walkthrough tailored to that lineage, see how to grow Big Bud strain. These lines were bred with yield and density as primary traits. Avoid pure sativas or equatorial varieties unless your climate is genuinely tropical.
Starting right: seeds vs clones and healthy early growth
You can start from feminized seeds or from rooted clones taken from a known mother plant. Both work outdoors. Seeds require germination (usually 2 to 5 days in a moist paper towel or direct-to-medium method) and a seedling stage of 2 to 3 weeks before transplanting. Clones skip that window and arrive already in vegetative growth, which can save 3 to 4 weeks. However, clones can carry pests or pathogens if they come from a poorly managed source. If you buy clones, inspect carefully for spider mites, powdery mildew, or fungus gnats before they go anywhere near your outdoor space.
Whether starting from seed or clone, the goal for the first 3 to 4 weeks is strong root development and vigorous foliage. Keep seedlings in a sheltered spot with at least 6 hours of direct light and temperatures between 20 and 28°C (68 to 82°F). Avoid overwatering: the root zone should dry out slightly between waterings to encourage roots to explore the medium. Start seeds in small containers (1 to 2 L) and pot up to your final container size once the plant is well-rooted and showing healthy new growth.
Picking your site: sun, wind, privacy and microclimate
The single biggest outdoor yield and density factor you control from day one is sun exposure. For step-by-step techniques on how to make buds grow faster outdoors, see this guide on how to make buds grow faster outdoors. Cannabis needs a minimum of 6 direct sunlight hours per day to flower and produce well, but for genuinely dense buds outdoors you want 8 to 10 hours of unobstructed direct sunlight. South-facing positions (in the Northern Hemisphere) are ideal. Avoid spots shaded by buildings, tall trees, or fences during the critical midday hours.
Microclimate matters as much as raw sun hours. A south-facing slope, a white-painted wall that reflects additional light, or a sheltered courtyard can meaningfully increase temperatures and reduce wind stress. Wind at moderate levels is helpful for stem strength and airflow through the canopy, which reduces humidity and bud rot risk. Excessive wind, however, stresses plants and can slow growth. A windbreak on one side without fully blocking airflow is often the best solution. Elevation, proximity to water, and urban heat islands all affect your microclimate, so scout your specific spot at different times of day before committing.
- Track sunlight at your chosen spot from mid-morning to late afternoon on a clear day before planting.
- Avoid low-lying areas where cold air pools overnight and morning fog lingers: this adds humidity and bud rot risk.
- A slight slope or raised bed improves drainage and reduces the standing-water conditions that invite root rot.
- Privacy and security: most legal jurisdictions require plants not be visible from public spaces. Hedges, lattice screens, or a dedicated enclosed garden area address both the legal requirement and basic security.
- Proximity to a water source matters more than beginners expect. Outdoor plants in full sun need significant watering volumes in midsummer.
Soil vs containers: which one is right for your grow
Both native ground soil and containers can produce excellent dense buds outdoors. The choice depends on your space, your soil quality, and how much control you want. Here is a clear breakdown:
| Factor | In-Ground Soil | Containers |
|---|---|---|
| Root volume | Essentially unlimited, best for maximum plant size | Limited by pot size; 30–50 L minimum for large plants |
| Drainage control | Depends on native soil quality | Fully controllable with potting mix choice |
| Nutrient management | Harder to adjust once amended; buffered by soil biology | Easier to flush, adjust, and re-feed |
| Mobility | None; plants are fixed once established | Can be moved for weather, security, or light optimization |
| Risk of soil-borne pests/disease | Higher if site history is unknown | Lower with fresh sterile media each season |
| Cost | Lower if existing soil is usable | Higher due to containers and commercial media |
| Best for | Growers with good native soil and permanent garden space | Renters, urban growers, poor native soil situations |
If you go with containers, container size is not something to economize on. Research across multiple crop species shows clearly that restricting root volume reduces above-ground plant biomass. For a single outdoor plant targeting dense, heavy colas, you want a minimum of 30 to 40 liters. A 50-liter fabric pot or air-pot is even better, particularly for large indica hybrids that can stretch to 1.5 to 2 meters outdoors. Fabric pots and air-pots encourage air-pruning of roots, which prevents root-circling and keeps the root system actively producing new feeder roots throughout the season. I personally use 45-liter fabric pots for my main outdoor plants and the difference in canopy size compared to smaller containers is dramatic.
Building your outdoor growing medium
Whether you're filling containers or amending an in-ground bed, the goal is the same: a light, well-draining, biologically active medium with buffered nutrition that takes care of your plant through most of the vegetative phase with minimal liquid feeding. Cannabis roots need oxygen as much as they need water. If your medium stays waterlogged, roots suffocate and nutrient uptake stalls, producing the exact conditions that lead to loose, underdeveloped buds.
A basic outdoor potting mix recipe
A reliable starting point for outdoor containers is roughly 40% quality peat-based or coco-based potting compost, 30% perlite or pumice for drainage and aeration, 20% well-aged compost or worm castings for biological activity and slow-release nutrition, and 10% additional amendments. For those additional amendments, you can add blood meal or feather meal for slow-release nitrogen, bone meal or rock phosphate for phosphorus, kelp meal for trace minerals and natural plant-growth regulators, and dolomite lime to buffer pH toward the 6.0 to 7.0 range suitable for cannabis in soil.
Mycorrhizal fungi and beneficial microbes
Adding arbuscular mycorrhizal fungi (AMF) inoculant at transplant is one of the most cost-effective investments you can make for outdoor plants. Peer-reviewed hemp and cannabis research confirms that AMF inoculation improves root function, increases nutrient uptake efficiency, and in several trials produced measurable increases in cannabinoid content and flower yield. Apply the inoculant directly to the root zone at transplant, not mixed into the full medium, so spores make direct contact with roots. Beneficial bacterial products containing Bacillus subtilis or Trichoderma species also improve soil health and can suppress some soil-borne pathogens.
Biochar as a soil amendment
Biochar is worth including if you can source a reputable product. Hemp hurd-derived and wood-based biochars have shown benefits for soil nutrient retention, water-holding capacity, and microbial activity in peer-reviewed cannabis and hemp studies. The key is application rate and feedstock: results are highly variable, and more is not better. A standard starting rate of 5 to 10% biochar by volume mixed into your medium before planting is a reasonable approach. Pre-charge the biochar by mixing it with compost or a nutrient solution a week before use so it doesn't strip nitrogen from your soil as it absorbs moisture.
Feeding during the vegetative stage: nitrogen, pH, and building a healthy plant
Dense buds at harvest are built by a well-fed plant during the vegetative phase. The vegetative stage is when you grow the structural framework, the branches and nodes, that will eventually carry your flowers. A nitrogen-deficient plant during veg will enter flowering underpowered and produce fewer, lighter buds regardless of what you do later.
Nitrogen targets and feeding schedule
During vegetative growth, nitrogen (N) is your primary focus. For soil and amended-media growers, a well-built soil mix will supply most vegetative N needs for the first 4 to 6 weeks. After that, begin supplemental liquid feeding. Look for fertilizers with an NPK ratio that emphasizes nitrogen, such as 3-1-2 or 4-2-3 style ratios. For liquid feeding in soil, a general target is to maintain visible dark green foliage without any yellowing of lower leaves, which is your practical indicator of adequate N. Avoid overshooting into dark, claw-like tips, which indicate nitrogen toxicity.
For growers moving into more precise feeding (whether in containers with inert media or running light soil mixes), peer-reviewed cannabis nutrient optimization research points to approximately 194 mg per liter of total nitrogen and 59 mg per liter of phosphorus as optimal concentrations during flowering in soilless systems. Vegetative-stage N demands are at least as high. These numbers are a reference point for liquid nutrient programs rather than a rigid recipe for soil growers, where buffering complicates direct translation.
pH: the gateway to nutrient availability
Even a perfect nutrient solution becomes useless if your root-zone pH is off. In soil, target a pH between 6.0 and 7.0, with 6.3 to 6.8 being the sweet spot where all major nutrients and micronutrients are simultaneously available. In coco coir or other soilless media, target 5.8 to 6.3. Always pH-adjust your water and liquid nutrients before applying. A basic digital pH pen is a worthwhile investment for any serious grower. I ignored pH for my first two outdoor seasons and spent a lot of time chasing deficiencies that were actually lockout problems.
Magnesium: an underrated density driver
Magnesium deserves special attention for outdoor growers aiming at resin-heavy, dense flowers. Peer-reviewed cannabis research found that adequate to elevated magnesium supply during reproductive growth measurably increased cannabinoid and terpene concentrations. During the transition from late veg into flowering, ensure your feed program includes a magnesium source. Epsom salt (magnesium sulfate) dissolved at roughly 1 to 2 grams per liter makes a reliable, cheap foliar or root-drench supplement. Cal-Mag liquid products serve the same purpose and are easier to dose for beginners.
Beginner vs advanced feeding approaches
- Beginner: use a pre-amended super-soil mix and follow the manufacturer's recommended supplemental feed schedule from week 5 onward using an all-in-one liquid nutrient. This removes most of the guesswork and still produces strong results.
- Intermediate: run a two-part or three-part liquid nutrient system (grow/bloom/micro or A+B style), adjusting ratios as you shift from veg to flower. Monitor plants visually and adjust by EC (electrical conductivity) with a basic meter.
- Advanced: build a custom soil with measured dry amendments, track root-zone pH weekly, run soil slurry tests, and supplement individually for N, P, K, Ca, Mg, and micronutrients based on observed deficiencies and growth stage targets.
Training your plants for more bud sites and better light penetration
Untrained outdoor cannabis naturally grows as a Christmas-tree shape with one dominant main cola and progressively shorter side branches. That structure concentrates most bud mass in one spot and leaves lower bud sites in the shade. Training breaks apical dominance and distributes energy across multiple colas, which meaningfully increases total flower mass and the number of dense bud sites. Recent cannabis‑specific reviews report that low‑stress training, topping, mainlining and SCROG alter apical dominance and canopy architecture to flatten the canopy, increasing cola count and effective light capture when timed correctly, Mainlining and high‑stress/low‑stress training perspectives for Cannabis sativa, PMC review (2025) Mainlining and high‑stress/low‑stress training perspectives for Cannabis sativa — PMC review (2025). The science behind this is well-established: removing the apical tip (topping) redirects plant-growth hormones, increasing lateral branching and creating more dominant growing points.
Topping
Topping means removing the main growing tip once your plant has developed 4 to 6 nodes. This splits the single apex into two, and both grow into main colas. You can top again 1 to 2 weeks later on the resulting two tops to get four main colas. Every topping adds recovery time, so plan to finish topping at least 3 to 4 weeks before the plant is expected to begin flowering. Outdoors in the Northern Hemisphere, that typically means completing your final topping by late June or early July for a natural outdoor cycle.
Low-stress training (LST)
LST involves bending and tying branches outward and downward to flatten the canopy. It can be used alone or combined with topping. Bend branches away from the center and secure them with soft ties or plant clips to the rim of your container or to stakes in the ground. The goal is a flat, even canopy where all bud sites receive equal light. LST can be continued throughout the vegetative phase with minimal stress to the plant. For autoflowers, LST is the preferred training method since heavy high-stress techniques like topping are risky on their fixed timeline.
SCROG (Screen of Green) and trellising
A SCROG involves placing a horizontal net or trellis above the plant and weaving branches through it as they grow, creating an even canopy at a uniform height. Outdoors, you can build a simple timber-frame trellis with nylon or polypropylene mesh. The practical benefit is that every bud site sits at approximately the same distance from the top of the canopy, maximizing light exposure across all of them. A horizontal trellis also supports heavy branches during late flowering when colas are at their heaviest and most vulnerable to snapping in wind.
When to stop training
Cannabis cultivation research and experienced growers consistently recommend stopping major mechanical training approximately 1 week after the plant commits to flowering. Outdoors, this means once you see the first clear flowering sites forming and the pre-flower stretch beginning, let the plant focus its energy on building buds rather than healing training damage. Continue LST adjustments if needed, but avoid additional topping, heavy defoliation, or major branch bending from this point forward.
Flowering-phase nutrients and supplements for denser buds
Once your plant shifts into flowering, the nutrient priority changes. For a practical step‑by‑step on maximizing resin and stickiness during flowering, see our guide on how to grow sticky buds. Nitrogen drops, phosphorus and potassium take a more prominent role in calyx development and resin production, and micronutrients like magnesium and calcium become increasingly important. Most pre-made 'bloom' fertilizers handle this shift, but understanding why it happens helps you troubleshoot problems.
Bloom-stage feed schedule (simplified)
| Flowering Week | Primary Focus | Key Nutrients | Notes |
|---|---|---|---|
| Weeks 1–2 (transition) | Supporting stretch, initiating bud sites | Moderate N, increasing P, K | Continue veg feed at reduced N ratio, introduce bloom base |
| Weeks 3–5 (bulking) | Calyx development and bud stacking | Low N, high P (~59 mg/L in soilless), moderate K, Mg | Main feeding window; add Cal-Mag if using RO or soft water |
| Weeks 6–8 (ripening) | Resin and terpene accumulation | Very low N, moderate P/K, Mg emphasized | Reduce or eliminate N; consider enzyme or carbohydrate supplements |
| Final 1–2 weeks | Flushing or plain watering | Plain water or light flush | Reduces mineral salt accumulation; improves finished taste and burn quality |
Phosphorus and potassium are often oversimplified as the flowering nutrients. The research is more nuanced: one peer-reviewed cannabis flowering study found that inflorescence yield was sensitive to nitrogen levels within a band of roughly 160 to 230 mg per liter (in soilless systems), while potassium showed no significant yield response across a wide range in that particular study. This suggests that maintaining adequate but not excessive nitrogen into early flowering, while supporting phosphorus in the 40 to 80 mg per liter range, is more impactful than loading up on potassium boosters, at least in nutrient-solution terms.
Environmental optimization: temperature, humidity, and airflow outdoors
Outdoor growers cannot dial in temperature and humidity the way an indoor grower can, but you have more influence over your microclimate than you might think. During the flowering phase, humidity management is the most critical environmental factor for both bud density and bud health. High relative humidity during flowering directly reduces cannabinoid concentrations and delays flowering development, based on peer-reviewed cannabis research. It also massively increases the risk of Botrytis cinerea (bud rot), the most destructive pathogen for dense outdoor buds.
Target conditions for outdoor flowering
- Daytime temperature during flowering: 20–28°C (68–82°F) is ideal. Above 30°C, terpenes begin to volatilize and enzyme activity starts to impair bud development.
- Nighttime temperature: above 10°C (50°F) to avoid cold stress. A 5–10°C differential between day and night during late flowering can actually encourage resin production.
- Relative humidity (RH) during flowering: keep daytime canopy RH below 65%. Below 50% RH is even better during the final 4 weeks of flowering.
- Vapor pressure deficit (VPD) during flowering: target roughly 0.9–1.3 kPa. This range supports active transpiration (nutrient flow into buds) while keeping plant surfaces dry enough to resist fungal colonization.
- Airflow: ensure gentle air movement through the canopy at all times, especially after rain and in the morning when dew burns off. Stagnant air is bud rot's best friend.
Managing humidity outdoors
You cannot run a dehumidifier in your garden, but you can influence canopy humidity meaningfully. Thin your canopy by removing fan leaves that block airflow through the interior of the plant, particularly during weeks 4 to 6 of flowering. Open up the lower canopy so air circulates through the plant structure rather than pooling in dense leaf pockets. Space your plants so air moves freely between them. If you grow in a coastal or humid climate, consider whether a temporary rain cover or poly-tunnel during wet weather is feasible: even short periods of leaf and bud surface wetness (8 to 12 hours) at cool to moderate temperatures are enough to establish Botrytis infections, based on infection-risk models developed for similar fungal pathogens on fruiting crops.
Pest and bud rot prevention specific to outdoor growing
Dense, resinous buds are attractive to more than just you. Outdoors, you're managing a range of insects, powdery mildew, and most critically, Botrytis cinerea (gray mold / bud rot). Bud rot is devastating because it starts inside the cola where you can't see it, and by the time it's visible on the outside the interior is already compromised.
Preventing bud rot
Botrytis infection requires three conditions to be present simultaneously: susceptible plant tissue (dense buds, especially those with thick water-retaining bracts), a source of spores (present everywhere outdoors), and prolonged surface wetness combined with moderate temperatures. For step-by-step prevention tactics and seasonal tips, see a focused guide on how to prevent bud rot outdoor grow. Infection risk is high when RH exceeds roughly 90 to 93% and bud surfaces remain wet for more than 6 to 8 hours, particularly in the 12 to 22°C temperature range. This means that a cool, rainy autumn night followed by a slow-drying morning is your highest-risk window.
- Inspect dense colas two to three times per week during flowering, particularly after rain. Look for brown or grayish discoloration at the base of pistils or inside the cola structure.
- If bud rot is found, remove the entire affected cola immediately with clean scissors, seal it in a bag without shaking it (to avoid spreading spores), and discard it away from your growing area.
- Preventive copper-based or potassium bicarbonate sprays applied in the early evening can reduce Botrytis pressure. Stop foliar sprays on buds in the final 3 to 4 weeks before harvest.
- Strategic defoliation of leaves inside and below the canopy during weeks 3–4 of flowering opens air channels that dramatically reduce interior humidity.
- Avoid over-watering: wet soil combined with high exterior RH creates a humidity microclimate around the base of the plant that raises spore germination rates.
Common outdoor pests and management
| Pest | Signs | Organic Management Options |
|---|---|---|
| Spider mites | Fine webbing on undersides of leaves, stippled yellowing | Neem oil, insecticidal soap, predatory mites |
| Aphids | Clusters on new growth, sticky honeydew residue | Neem oil, pyrethrin spray, ladybug release |
| Caterpillars / budworms | Frass (droppings) in buds, entry holes in colas | BT (Bacillus thuringiensis) spray, hand removal |
| Fungus gnats | Larvae in soil, adults flying around base | Yellow sticky traps, beneficial nematodes, diatomaceous earth top-dressing |
| Thrips | Silver streaking on leaves, tiny insects visible | Spinosad spray, predatory insects |
Watering, staking, and late-season outdoor care
Outdoor plants in full sun during midsummer can transpire enormous volumes of water. A large plant in a 45-liter fabric pot on a hot day may need 10 to 20 liters of water. Underwatering during flowering is a significant but underappreciated cause of airy buds: water stress directly reduces nutrient uptake and cell expansion. On the other hand, a constantly saturated medium invites root problems. The right technique is to water thoroughly when the top 2 to 3 cm of the medium is dry, then wait until it dries again before repeating. For large containers, this often means daily or every-other-day watering in peak summer heat.
Staking becomes critical in weeks 5 to 8 of flowering when your colas are at their heaviest. A bamboo stake tied loosely to the main stem is the minimum. For heavily trained plants with multiple large colas, a central tomato cage or DIY bamboo-and-twine network keeps branches from snapping. A snapped branch in week 7 is a painful waste of a whole season's work. I tie my main branches to stakes from early flowering and add extra support as buds fill in.
Practical outdoor growing timeline
| Stage | Approx. Dates (Northern Hemisphere) | Key Tasks |
|---|---|---|
| Germination and seedling | Late March – April | Germinate seeds, grow seedlings under cover or indoors |
| Early veg and transplant | Early-mid May (after last frost) | Transplant outdoors, begin LST, first topping if photoperiod |
| Mid-to-late veg and training | May – June | Continue topping/LST/SCROG setup, build canopy, feed nitrogen |
| Pre-flower transition | Late June – July | Final training, shift to bloom nutrients, set up trellis/stakes |
| Early flowering (stretch) | Late July – early August | Reduce N, increase P/Mg, monitor for pests, open canopy for airflow |
| Peak flowering (bulking) | August – early September | Full bloom nutrition, inspect for bud rot daily after rain, support heavy colas |
| Late flowering (ripening) | September – October | Reduce/eliminate N, monitor trichomes, manage humidity, stop foliar sprays |
| Harvest, dry, cure | October (varies by strain and climate) | Harvest by trichome assessment, dry at 15–20°C / 50–60% RH, cure in jars |
Knowing when to harvest for maximum density and potency
Harvesting at the right moment preserves the density and resin you've spent months building. The most reliable method is trichome inspection with a 60x to 100x jeweler's loupe or pocket microscope. Trichomes pass through three observable stages: clear and translucent (too early, THC not yet fully developed), milky white or cloudy (peak THC, good harvest window), and amber (THC converting to CBN, more relaxing effect). For maximum potency and density perception, harvest when trichomes are predominantly cloudy with up to 10 to 30% amber, depending on your preference. A harvest pulled too early will have lighter, less developed calyxes even if the plant looked close. A harvest pulled too late loses terpenes and density to cellular breakdown.
Drying and curing to protect your hard work
Even the densest, most resinous outdoor buds can be ruined in the drying and curing stage. Drying too fast (common when room temperatures are above 25°C or humidity is very low) causes the outside to dry while the inside remains moist, resulting in a harsh, underdeveloped flavor and potential mold in jars during curing. Research on cannabis and hemp post-harvest processing shows that drying at 15 to 20°C (59 to 68°F) with relative humidity between 50 and 60% produces the best cannabinoid and terpene retention.
After drying for 10 to 14 days (when small stems snap cleanly rather than bending), transfer buds to glass jars filled to about 75% capacity. Seal the jars and open them once or twice daily for the first two weeks to release moisture and exchange air (this is called burping). Target an in-jar RH of 58 to 62%, which can be maintained and monitored with a small hygrometer insert or Boveda humidity packet. At this RH range, curing proceeds safely without mold growth, and terpenes continue to develop over 4 to 8 weeks of sealed curing. The difference in aroma, flavor, and perceived quality between a 1-week-cured and a 6-week-cured bud is not subtle.
Troubleshooting common problems
Airy, loose buds at harvest
Airy buds outdoors are almost always caused by one or more of the following: insufficient direct sunlight (below 6 to 8 hours per day), genetics not suited to your climate or season length, high humidity and low VPD during flowering, nitrogen excess carrying into late flowering, or harvesting too early. Review each factor honestly against what you actually did. In my experience, sun hours and genetics account for the majority of disappointing outdoor bud density.
Nutrient deficiency signs and quick fixes
| Deficiency | Visual Signs | Quick Action |
|---|---|---|
| Nitrogen (N) | Yellowing starting at oldest/lower leaves, spreading upward | Apply nitrogen-rich liquid feed; check pH first |
| Magnesium (Mg) | Interveinal yellowing on middle-aged leaves (green veins, yellow between) | Epsom salt foliar or root drench at 1–2 g/L; adjust pH to 6.0–7.0 |
| Calcium (Ca) | Brown spots on new growth, distorted leaf tips | Cal-Mag supplement; check pH is above 6.0 in soil |
| Phosphorus (P) | Purpling of stems and leaf undersides, darkened leaves | Switch to bloom-stage nutrient; raise pH slightly if below 5.8 |
| Iron (Fe) | Yellowing of newest growth with green veins | Check pH: most Fe lockout is pH-related. Lower to 6.0–6.5 in soil |
Quick-reference checklists for each stage
Before you plant
- Confirm legality and plant-count limits in your jurisdiction.
- Choose an indica-dominant or balanced hybrid with documented bud density.
- Select a site with 8+ hours of direct sunlight.
- Prepare containers (minimum 30 L, ideally 45–50 L fabric pots) or amended in-ground beds.
- Build or purchase a well-draining, biologically active medium with AMF inoculant ready.
Vegetative phase
- Maintain pH 6.0–7.0 in soil (5.8–6.3 in coco/soilless).
- Feed nitrogen-forward nutrients from week 5 onward.
- Complete topping by late June (Northern Hemisphere photoperiod).
- Begin LST early and continue through veg to flatten canopy.
- Set up trellis or SCROG net before plants enter stretch.
- Supplement with Cal-Mag if using low-mineral or filtered water.
Flowering phase
- Shift to bloom nutrients within the first week of visible flowering.
- Keep daytime canopy RH below 65%, targeting below 50% in last 4 weeks.
- Defoliate inner canopy leaves in weeks 3–4 of flowering to improve airflow.
- Inspect buds 2–3 times weekly for early bud rot after any rain or dew event.
- Stake and support heavy colas from week 4–5 of flowering.
- Maintain magnesium supplementation through week 7.
- Stop all foliar spraying 3–4 weeks before anticipated harvest.
Harvest, dry, and cure
- Assess trichomes with a loupe: harvest at mostly cloudy with some amber.
- Dry whole branches or individual colas in a dark room at 15–20°C and 50–60% RH.
- Drying is complete when small stems snap rather than bend (roughly 10–14 days).
- Cure in glass jars at 58–62% RH, burping daily for the first 2 weeks.
- Cure for a minimum of 4 weeks for full terpene development; 6–8 weeks for premium results.
FAQ
What are the best strain types to choose for growing dense, big, sticky buds outdoors?
Choose genetics bred for big, compact flowers and resin production. Look for indica‑dominant or indica‑hybrid strains labeled as “big bud,” “compact cola,” or bred for resin/terpene production. Prefer proven outdoor/field varieties with shorter, predictable flowering windows if you have a limited season. Use locally adapted cultivars or regionally tested cultivars (and read breeder notes for canopy size and disease resistance). Always buy seeds/clones from reputable, legal sources and verify that the strain is permitted where you live.
How do I legally check whether I can cultivate cannabis outdoors at home?
Check local, state/provincial and national laws for home cultivation limits, license requirements, allowable plant counts, location restrictions (indoor/outdoor rules), and possession limits. Comply with age limits, fencing/visibility requirements, and any seed/seedling registration. When in doubt, contact local regulatory offices or consult official government websites. Never advise or act outside the legal framework in your jurisdiction.
Should I plant in ground beds or containers to maximize bud size and density?
Both work; choose based on soil quality, mobility needs and root volume. In‑ground beds with deep, well‑amended soil generally allow the largest root systems and biggest plants when soil is fertile and drainage is good. If soil is poor, use large containers (30–50+ L / ~12–15+ gallons or 40–50 cm diameter air/fabric pots) to avoid root restriction—larger volumes correlate with more vegetative growth and heavier colas. Containers also allow more control over medium, nutrients and drainage and protect against soilborne pests.
How should I prepare outdoor soil or potting mix for flowering dense buds?
Aim for a loose, well‑draining, biologically active medium with good water retention. For beds: incorporate compost (10–25% by volume), well‑aged manure, mycorrhizal inoculant, biochar (matched to soil test), and balanced organic amendments. For containers: use a premium soilless mix (peat/coir + perlite) amended with compost, slow‑release fertilizer and mycorrhizae. Test pH (optimal 6.0–6.8 for soil; 5.8–6.2 for soilless) and adjust. Avoid fresh manure or high‑salt fertilizers close to transplant.
Which root and microbial amendments help increase bud density?
Use arbuscular mycorrhizal fungi (AMF) inoculants at transplant to improve root access to water and nutrients—controlled trials show growth and sometimes cannabinoid benefits. Incorporate compost, effective microbial inoculants, and modest biochar to improve nutrient retention and microbial habitat. Match amendments to soil tests; overapplication of amendments can cause imbalances.
What vegetative training methods reliably increase bud count and density outdoors?
Use evidence‑based methods: - Topping/mainlining: remove the apical leader and train main branches to redistribute hormones and create many equal colas. - Low‑stress training (LST): bend and tie branches to flatten the canopy and improve light penetration. - SCROG (screen of green): use a screen to create an even canopy and expose more bud sites to direct light. - Trellising/staking: support heavy colas to prevent breakage and maintain airflow. Timing: perform major topping and high‑stress moves early in veg; avoid heavy stress ~1 week after photoperiod flip or once stretch is mostly finished.
How to Grow Buds Bigger, Denser, and Heavier
Step-by-step guide to grow bigger, denser, heavier cannabis buds with lighting, environment, nutrients, training, and fi