Growing big, dense, heavy buds comes down to a handful of controllable variables: light intensity and coverage, canopy architecture, airflow, temperature and humidity (specifically VPD), watering and dry-down timing, and feeding strategy. Get those right across mid-veg through late flower, and your plants will produce the kind of buds you actually set out to grow. Get even one of them consistently wrong, and you'll cap your yields no matter how good your genetics are. This guide walks through every lever, in the order you'd actually use it during a grow.
How to Grow Buds Bigger, Denser, and Heavier

Marcus Holbrook
17 Apr 2026
What bud size and density actually depend on
Before diving into tactics, it helps to understand the real determinants of bud weight and density. Meta-analytical research on cannabis yield consistently identifies plant genetics, light intensity, nutrient inputs, temperature, and the duration of the flowering stage as the primary drivers of yield per plant and per square meter. That means if your genetics are mediocre, your ceiling is low regardless of technique. But assuming you've chosen a solid strain, the remaining variables are almost entirely within your control as a home grower.
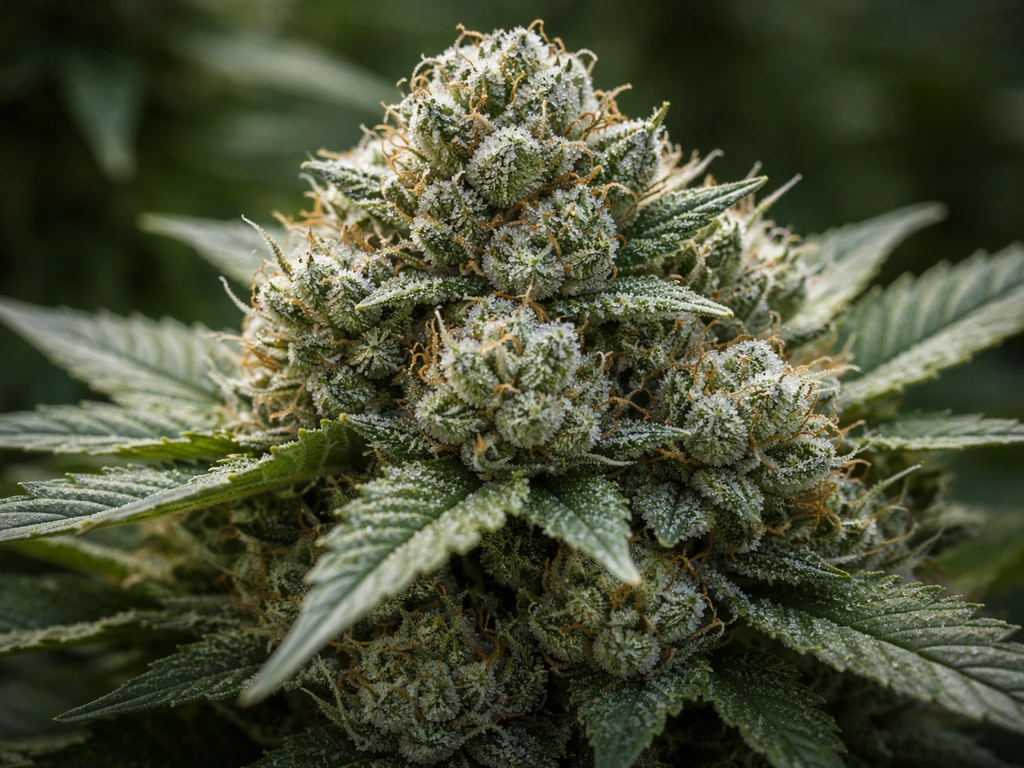
Density specifically is about how tightly the calyx tissue packs together during flower development. It's influenced by temperature swings (warm nights loosen structure), light quality and intensity at canopy level, and genetics. Weight is a product of both density and bud site count, which is where training comes in. Resin production, which affects how buds feel and look, is its own dimension and something worth reading about if you want to grow sticky buds alongside heavy ones.
Grow setup basics: light, spacing, canopy, and airflow
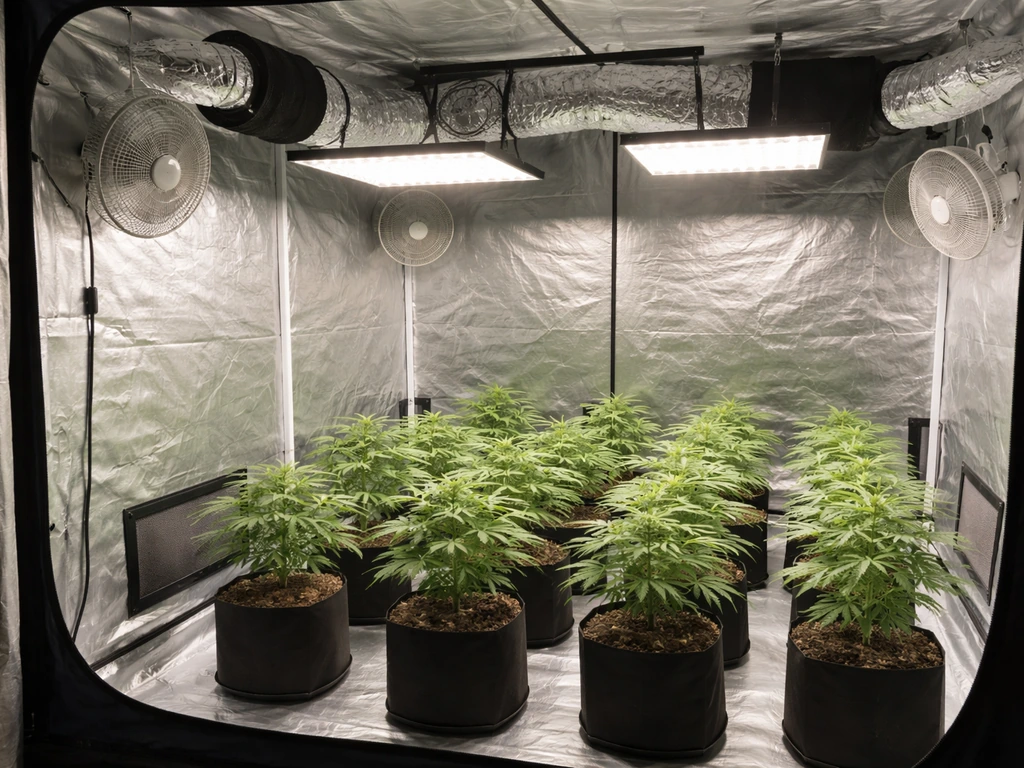
Light is the single biggest lever for indoor yields. Research measuring canopy-level PPFD across a range of 120 to 1,800 µmol·m⁻²·s⁻¹ confirms that inflorescence yield responds directly to increasing light levels at the canopy. For most home growers, a practical target during flower is 600 to 900 µmol·m⁻²·s⁻¹ at canopy level for mid-tier setups, scaling toward 1,000 to 1,200 µmol·m⁻²·s⁻¹ if your CO2 is supplemented and your plants can handle the intensity without heat stress. The key word here is canopy-level: fixture wattage tells you almost nothing useful. Get a PAR meter or use a PPFD app to measure what your plants are actually receiving.
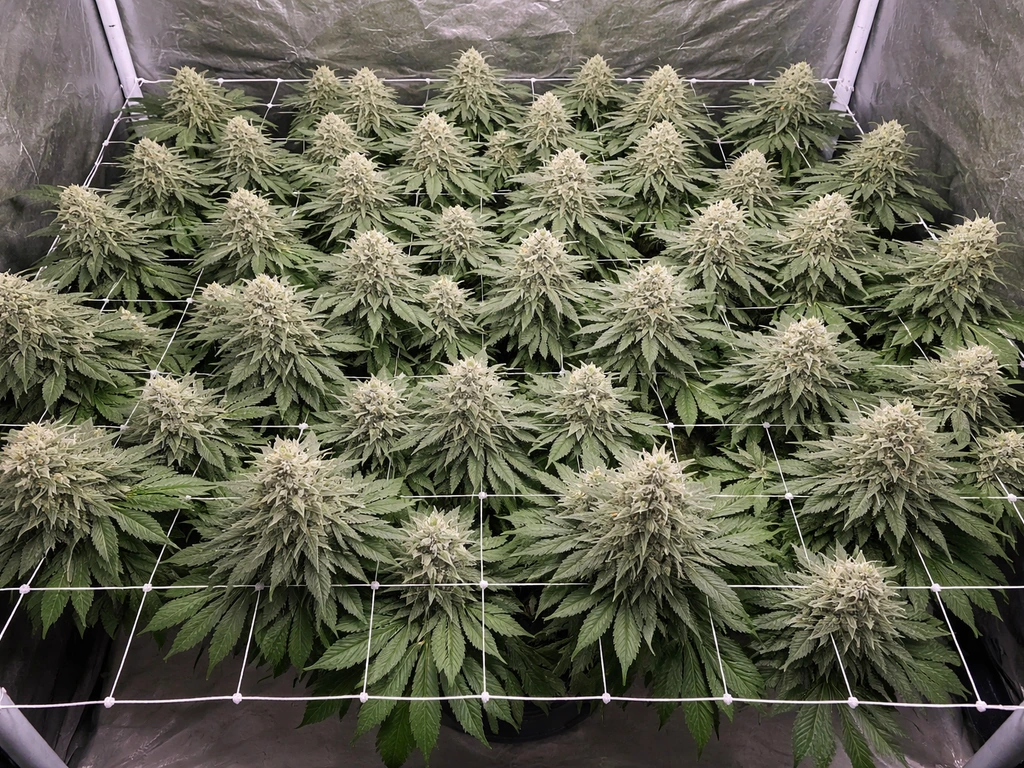
Canopy evenness matters as much as peak intensity. A hotspot at 1,200 µmol·m⁻²·s⁻¹ surrounded by edges receiving 300 µmol·m⁻²·s⁻¹ means the majority of your bud sites are light-starved. Use reflective walls (flat white paint or mylar), position your light to match your canopy footprint, and consider multiple smaller lights rather than one massive fixture if your tent or room is large. Outdoor growers don't have to chase PPFD numbers but do need to think about canopy exposure: full, direct sun for the majority of the photoperiod is what drives outdoor bud development, and it's a core part of learning how to grow dense buds outdoors.
Airflow is underrated by beginners and I say that from experience. Stagnant air creates pockets of high humidity directly around bud sites, raises canopy temperature above ambient, and makes conditions ideal for pathogens. You need two types of movement: circulation fans that keep air moving across and through the canopy, and an exhaust system (for indoor grows) that replaces stale air and controls temperature and humidity. A gentle oscillating fan positioned to ruffle leaves without blowing them sideways is the right intensity. During flower, point circulation away from buds if you're in late stage to reduce trichome damage, and prioritize airflow through the lower canopy where humidity pools.
Spacing is tied directly to light penetration. Overcrowding plants reduces the light each one receives and creates humidity traps between canopies. For indoor grows, one plant per square foot is a common starting point for Screen of Green (ScrOG) setups, with wider spacing if you're running taller, less-trained plants. Outdoor plants can grow enormous if given enough space, sunlight, and root volume, and if you want to push that potential you'll want to check out what's possible when you grow fat buds in an unconstrained outdoor environment.
Nutrition and feeding for dense, heavy buds
pH, EC, and VPD basics
pH is the most commonly mismanaged variable in home grows. Cannabis in soil performs best with a root zone pH between 6.2 and 6.8, with 6.4 to 6.5 being the sweet spot for broadest nutrient availability. In coco or hydroponic systems, target 5.8 to 6.2. Outside those ranges, certain nutrients become chemically unavailable even when they're physically present in your medium, a condition called nutrient lockout. If your leaves are showing deficiency symptoms and you're feeding correctly, check pH first before adding more nutrients.
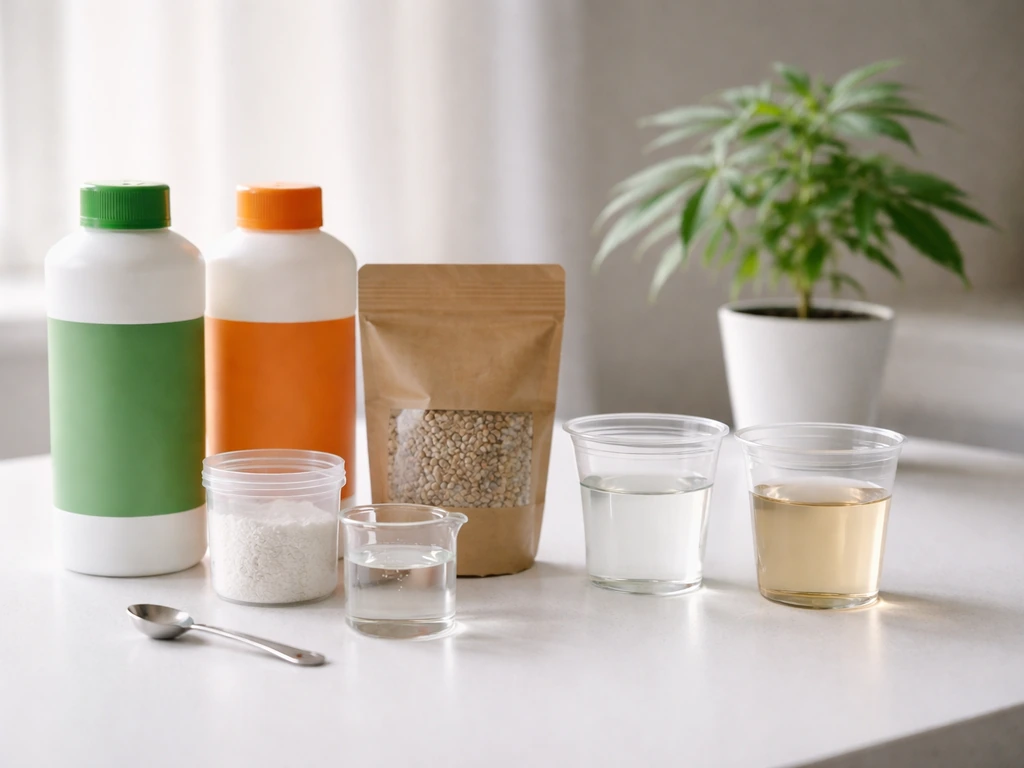
EC (electrical conductivity) measures nutrient concentration in your feed water. Seedlings and early veg: 0.8 to 1.2 mS/cm. Late veg: 1.2 to 1.6. Early flower: 1.6 to 2.0. Peak flower (weeks 3 to 6): 1.8 to 2.2. Late flower / flush period: taper back down to 0.5 to 1.0 or plain water depending on your medium and nutrient line. Running too high an EC causes salt buildup and osmotic stress, too low leaves your plants underfed. Measure runoff EC periodically, especially in coco and soil, to catch salt accumulation early.
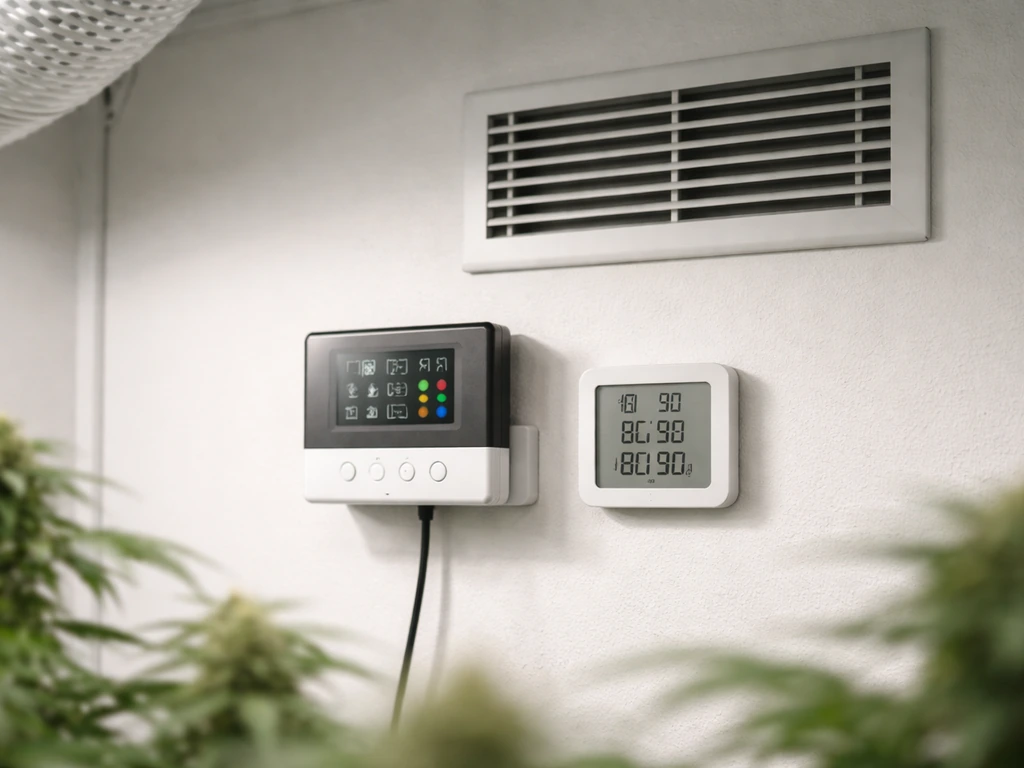
VPD (vapor pressure deficit) is the relationship between temperature and relative humidity that determines how aggressively your plant is transpiring. It's more actionable than just watching humidity alone. During veg, target a VPD of 0.8 to 1.2 kPa. During early flower, 1.0 to 1.3 kPa. During mid to late flower, 1.2 to 1.6 kPa, achieved by keeping temperature between 68 and 79°F (20 to 26°C) and gradually dropping humidity from around 55% in early flower to 40 to 45% by week 6 onward. Tighter VPD management means your plant is uptaking nutrients more efficiently and you're reducing mold risk simultaneously.
What to feed and when
During veg, nitrogen drives vegetative growth. Transition to a balanced or slightly phosphorus-forward formula at the flip to 12/12 (or when you see pre-flowers outdoors). By weeks 2 to 4 of flower, shift to a high-phosphorus, high-potassium bloom formula. P and K are the primary drivers of bud development, calyx stacking, and density. Maintain modest nitrogen through mid-flower (deficiency causes premature leaf drop and slows photosynthesis), but avoid high-nitrogen feeds after week 4 of flower as it can delay ripening and create loose, airy buds.
Cal-Mag supplementation is important in coco or with RO water regardless of stage. Silica in veg through early flower builds cell wall strength and helps support heavy bud structure, which matters more as flowers get bigger and heavier. In late flower (weeks 6 to 8 for most strains, or the final 1 to 2 weeks), begin tapering or flushing to clear accumulated salts and allow the plant to finish ripening cleanly. Hydro growers can reduce EC to 0.5 to 0.8 for the final week. Soil growers can simply water with plain pH'd water for the last 5 to 10 days.
Watering and dry-down timing
Overwatering is the number one beginner mistake. Roots need oxygen as much as they need water. In soil or coco, let the medium partially dry between waterings: lift the pot and water when it feels noticeably lighter, or insert a finger 2 inches deep and water when that layer is dry. In fabric pots, you'll often see the sides pull away slightly when it's time to water. The dry-down cycle drives root oxygen uptake and triggers the plant to actively search for water and nutrients, which improves overall vigor and bud development. In deep water culture or recirculating hydro, oxygenation comes from air stones and pump flow rate rather than dry-down cycles.
Training methods that build bud sites and canopy
Training shapes how many bud sites your plant develops and how much light each site receives. The two most impactful methods for maximizing yield are topping and low-stress training (LST). Topping involves cutting the main apical stem during veg to produce two main colas instead of one, and repeat topping creates four, eight, or more roughly equal main sites. This produces a more even canopy and more even light distribution.
Research specifically supports defoliation and canopy modification as effective means of improving light penetration in denser plant configurations, which translates directly to larger, more developed buds lower in the canopy. A PubMed review also reports that shoot architecture manipulation, including defoliation-related treatments, can increase inflorescence yield and improve cannabinoid profile uniformity [defoliation and canopy modification](https://pubmed. ncbi. nlm.
nih. gov/34579367/).
LST involves gently bending and tying branches outward and downward to flatten the canopy and expose bud sites that would otherwise remain in the shadow of the main stem. Combined with topping, LST is arguably the highest-value training approach for home growers because it's low-risk, reversible, and doesn't require recovery time the way high-stress topping does. Start LST in early to mid-veg when stems are still flexible. By the time you flip to flower, your canopy should be relatively flat with multiple bud sites at similar heights.
Defoliation during flower is a more advanced technique. Strategic removal of fan leaves that block light to bud sites, typically done at the transition into flower (day 1 to 3 of 12/12) and again around day 21, opens the canopy and redirects plant energy toward flower development. Don't strip the plant bare: remove only leaves that directly block bud sites or create humidity pockets in dense interior zones. If you want to push to the next level and combine training with the right genetics, reading up on how to grow big buds fast covers some of the timing strategies in more detail.
Flowering triggers and environmental targets by week
For photoperiod strains indoors, flowering is triggered by switching the light schedule to 12 hours on, 12 hours off. Make sure your dark period is completely uninterrupted: even a brief light leak can disrupt flowering or cause hermaphroditism. Outdoors, photoperiod plants flower naturally as days shorten past a certain threshold, typically late July through August in the Northern Hemisphere. Autoflowering strains flower based on age rather than light schedule, making them more predictable for outdoor seasonal timing.
| Flower Week | Temperature (°F) | Relative Humidity (%) | VPD (kPa) | EC (mS/cm) | Key Actions |
|---|---|---|---|---|---|
| Week 1 to 2 (Transition) | 72 to 82 | 55 to 60 | 0.9 to 1.1 | 1.6 to 1.8 | Flip light, begin bloom nutes, start LST adjustments |
| Week 3 to 4 (Early Flower) | 70 to 80 | 50 to 55 | 1.0 to 1.3 | 1.8 to 2.0 | Stretch ends, defoliate day 21, raise light slightly |
| Week 5 to 6 (Peak Flower) | 68 to 78 | 45 to 50 | 1.2 to 1.5 | 1.8 to 2.2 | Max P/K feed, monitor trichomes, control humidity tightly |
| Week 7 to 8 (Late Flower) | 65 to 75 | 40 to 45 | 1.3 to 1.6 | 1.0 to 1.4 | Taper nutrients, watch for amber trichomes, reduce humidity |
| Final Week (Ripening) | 62 to 72 | 38 to 42 | 1.4 to 1.7 | 0.5 to 1.0 | Flush or plain water, drop night temp 5 to 10°F for color/density |
The flowering stretch (the rapid vertical growth that happens in the first 2 to 3 weeks after flip) can be controlled by keeping temperatures slightly cooler and avoiding excess nitrogen during this phase. Strains vary widely: sativas and sativa-leaning hybrids can double in height during stretch, while indica-dominant strains tend to stretch 30 to 60%. Factor this into your training timing. If you're working in a height-limited space, top and LST aggressively before the flip and consider supercropping (pinching and bending thick branches) during the first week of stretch to control height and redirect energy to bud sites.
If you're growing outdoors and want to accelerate your timeline, the environmental triggers work somewhat differently. Understanding how to make buds grow faster outdoors involves manipulating light exposure, pot size, and feeding timing relative to your local seasonal window rather than a controlled light schedule.
Common problems that cap bud size and how to fix them
Light problems
Insufficient light is the most common reason indoor buds stay small and airy. If your buds are stretching toward the light, producing sparse calyx structure, or feel light for their visual size, insufficient PPFD is the first thing to check. Measure at canopy level with a PAR meter. Light burn (too close, too intense) presents differently: bleached tips, upward-curling leaves near the light, and stunted growth near the top of the canopy. Raise the fixture and verify the manufacturer's recommended hanging height for your light at the target PPFD.
Nutrient issues
Yellowing leaves in mid-flower can be nitrogen deficiency (lower leaves first, progressing upward) or a sign of normal senescence near harvest. Yellowing with purple stems and dark, slow growth in early flower suggests phosphorus deficiency, often triggered by cold root zone temperatures below 60°F (15°C) or incorrect pH. Burned tips across multiple leaves usually indicate EC is too high. The fix is a partial flush followed by resuming feeding at a lower concentration. Lockout from pH drift is different from actual deficiency: the nutrients are there, the plant just can't access them. Correcting pH and doing a flush usually resolves this within a few days.
Overwatering and underwatering
Overwatered plants droop with leaves that look full and swollen but sad, curling down uniformly. Underwatered plants also droop, but leaves are thin, papery, and slightly crispy at the edges. The fix for overwatering is straightforward: stop watering and let the medium dry out properly before the next feeding. Don't compensate by adding nutrients to the next water if the plant was already fed at correct EC before the issue. Resume normal schedule once the medium has cycled through a proper dry-down.
Humidity, mold, and bud rot
Bud rot (Botrytis cinerea) is the most devastating late-flower problem and it can destroy weeks of work in days. It starts inside dense buds where humidity and limited airflow create the perfect fungal environment. Look for brown, mushy tissue appearing from inside the bud rather than on the outer leaves. At the first sign, remove the affected material entirely, sanitize tools between cuts, increase airflow, and drop humidity below 45%. Prevention is far better than treatment, which is why it's worth understanding the full picture around how to prevent bud rot in an outdoor grow before the problem appears. Indoor growers face the same pathogen under similar conditions.
Slow finishing and timing issues
Harvesting too early is one of the most common reasons home-grown buds feel less developed than expected. Trichomes are the most reliable harvest indicator: clear trichomes mean unripe, cloudy means peak THC, and amber means THC is degrading to CBN (which produces more of a body effect). For maximum bud density and weight, harvest when trichomes are mostly cloudy with 5 to 20% amber, depending on your preference.
Genetics also matters here: certain heavy-yielding cultivars simply need more time to fully develop, and choosing the right plant from the start shapes your ceiling. If you're aiming for a strain that's specifically selected for large bud structure, it's worth exploring how to grow Big Bud strain, which is one of the classic high-yield cultivars built for exactly this goal.
Your immediate next steps checklist
Here's what to actually do right now depending on where you are in your grow. Use this as a weekly reference until you've built the habit of checking each variable consistently.
- Measure PPFD at canopy level with a PAR meter or reliable app. Adjust fixture height and intensity until you're hitting 600 to 900 µmol·m⁻²·s⁻¹ during flower (1,000+ only with CO2 supplementation).
- Check and correct pH every feed. Soil: 6.2 to 6.8. Coco/hydro: 5.8 to 6.2. Test your runoff at least once a week.
- Verify EC of your feed solution matches the current stage. If you haven't checked runoff EC in more than two weeks, do it now to check for salt buildup.
- Calculate or estimate your VPD using a temperature and humidity reading. Adjust dehumidifier or humidifier as needed to stay within the target range for your current flower week.
- Assess your canopy: are bud sites receiving direct light? If not, do a targeted defoliation pass and adjust any LST ties that have loosened.
- Check airflow. Put your hand at several canopy locations and confirm gentle movement everywhere. Look for stagnant pockets, especially at the base of the canopy.
- Inspect bud sites closely for early signs of bud rot, powdery mildew, or pest damage. Address immediately if found.
- If you're in weeks 7 to 9 of flower, check trichomes under a jeweler's loupe or digital microscope. Plan your harvest window based on the cloudy-to-amber ratio you're seeing.
Every one of these checkpoints is something I've had to learn the hard way at some point. The good news is that cannabis is resilient, and consistent environment and feeding management in the second half of flower can recover a lot of early-stage imperfections. Stay consistent, keep records of what you change and when, and your next harvest will be heavier than your last.
FAQ
What’s the quickest way to confirm I’m giving enough light for how to grow buds bigger?
Use canopy-level PPFD, not fixture wattage. As a simple check, aim for 600 to 900 µmol·m⁻²·s⁻¹ in mid flower and verify uniformity across the canopy, because a hotspot can waste most of your bud sites even if the “average” looks good.
If my buds are still small, should I just increase feeding?
No, you can’t fix weak bud structure solely by raising nutrients. If buds are staying airy, first confirm light at canopy level and VPD targets. Only after those are in range should you adjust EC or recipe, because nutrient lockout from pH drift looks like a feeding problem.
How do I know whether high EC problems are salt buildup or true underfeeding?
If runoff is higher than your target EC, it often means salt buildup rather than “more nutrients needed.” In coco and soil, periodically measure runoff EC and pH, then correct by adjusting input EC and locking to the correct pH range, followed by a controlled flush during late flower if your line and medium support it.
Why do my lower buds stay airy even when the top looks good?
Big bud density usually fails because the canopy stays humid and shaded. Focus airflow through the lower canopy (where humidity pools), keep VPD in the stated flower ranges, and ensure your branches are trained to create light penetration before you rely on defoliation.
My humidity is okay some days, but buds are still loose. What’s missing?
Tighten the weak link first: canopy evenness, then VPD. Don’t just drop humidity, because overly cold or overly dry swings can stress the plant. A practical approach is to gradually lower humidity through flower while keeping temperature within roughly 68 to 79°F (20 to 26°C) so your VPD stays on target.
What should I check first if I see deficiency-looking symptoms early in flower?
If symptoms appear during early flower, cold root zone is a common cause of “mysterious” phosphorus deficiency. Check root temperatures and your pH in the reservoir or medium, since nutrient availability can drop quickly below about 60°F (15°C).
How can I tell the difference between nutrient lockout and real nutrient deficiency?
Yes, nutrient lockout can mimic deficiency. If you see multiple deficiencies at once, slow growth, or signs that don’t match your feed plan, measure pH (input and, if possible, runoff). Correcting pH often resolves issues without dramatically changing EC.
I overwatered once, now what do I do to recover quickly without harming bud development?
For indoor grows, stop watering and let the medium fully dry back to your usual “ready to water” point before resuming. Do not add extra nutrients to the next watering as a compensation tactic, because the root zone may still be too wet for normal oxygen uptake.
What are the practical first steps if I suspect bud rot inside the bud?
Bud rot prevention is mainly about microclimate. After any sign of swelling density, inspect the interior, increase airflow, and reduce humidity below about 45%. Also sanitize tools between cuts, because the fungus can transfer even when only a small section is removed.
How do I know I’m harvesting at the right time for denser, heavier buds?
Harvest timing can’t be replaced by calendar days alone. Use trichome color as your primary indicator, and consider your desired balance by aiming for mostly cloudy with 5 to 20% amber (preference dependent). If many plants show clear trichomes at the same time, it’s usually not “early harvesting,” it’s strain timing plus light and nutrition consistency earlier in flower.
When is the best time to start topping or LST to maximize bud sites and size?
Start training earlier than you think, so the canopy is already flattened before stretch ends. If you wait until after the main stretch, you lose the chance to equalize light at bud sites, and you end up with tall plants that have underlit lower flowers.
Should yellow leaves in late flower make me flush or just wait?
If you see leaf yellowing late in flower, check whether it’s progressing from lower leaves upward (often natural senescence) versus widespread yellowing with poor growth (often nutrient or pH related). Don’t automatically flush right away unless late-flower schedule and medium match your plan.
Next Article
How to Grow 1 Pound Per Plant: Yield Guide for Beginners
Step-by-step plan to grow ~1 lb per plant using strain choice, light, training, feeding, and troubleshooting for beginne